Custom Search
|
|
|---|
|
|
|---|
|
|
|---|
|
Custom Search
|
|
|---|
Recommended for developers:

![]()
Lesser Goldfinch family preening
![]()
LCD Vs. CRT - Do LCDs finally match CRTs in picture quality?
ECS P965T-A Motherboard
ABIT AN8 SLI Motherboard
Foxconn 975X7AB-8EKRS2H Motherboard
Foxconn BlackOps Motherboard
![]()
My misadventures flying with Allegiant Air
![]()
The Missing Post Mystery
A post I made to a Vista newsgroup was missing from the Outlook newsreader
Where did it go?
The Missing Post Mystery Revisited
It happened again! A post I made to a Vista newsgroup was missing from the Vista Mail newsreader
Where did it go?
A Case of Maxtaken Identity
When is a hard drive not a hard drive? Find out when!
![]()
Changes to the Windows 7 Taskbar You Should Know About
Vista Image Capture 'Slipstream' SP1 and SP2 into a single Vista install disc
Detailed Instructions for Reverse Integrating SP1 and SP2 into Vista
What is RAID? Some RAID Basics
RAID 5 on a Desktop PC
How to Personalize Windows Vista
Develop and Implement a Personal Backup Plan
Ten things you can do to create better documentation
(Tech Republic)
Flash Your BIOS
Three Good Reasons for Flashing Your BIOS
Ten common mistakes you should avoid when flashing your BIOS
(Tech Republic)
Find a new dial-up ISP
Sign up for 10 free hours of NetZero access!
Create a Shutdown/Sleep/Restart or Continue Icon For the Vista Desktop
What is a computer guy doing with home remodeling projects on his Website?
The Upscale Utility Room Remodel with Catch Basin and Wraparound Ceramic Tile Wall
The Bathroom Remodel for Under $1000 Project
The Do It Yourself Bedroom Engineered Prefinished Red Oak Wood Flooring Installation From Hell
Bedroom Remodel With Wood Parquet Flooring
Use Comodo Internet Security 4.0 to Lock Down Your PC Following a Windows Install or Reinstall
![]()
The Northstar Horizon Microcomputer
![]()
Round-Tailed Ground Squirrels

Prairie Dogs

American Kestrel Falcons "Sparrow Hawk"

Arizona Sonoran Desert

Arizona Sunsets

Cienega Creek

Trains In the Desert

Desert and Mountain Flowers

Fox Squirrels

![]()
The Other Reason Why Your Irrigation Valve Might be Leaking
My Response to the Newegg Affiliates Program Changes
Playing the Rebate Game
Know the Rules Before You Play
Vista Confusion
The four questions you need to ask before buying Vista
I explained to the sales rep that I had installed a parquet wood floor but this was my first 'plank' style flooring install. I remember specifically telling him that this project should be a piece of cake after the parquet wood flooring. If I only knew at the time how wrong that statement would turn out to be.
I found a nice deep rich red oak engineered that I liked. It was $1.49 per square foot. I needed 115 square feet but the flooring is sold in boxes of 35 square feet each. That meant that three boxes were 'close but no cigar'. I was told by the salesman that it was a good idea to buy extra since 10% or more of the pieces would be considered seconds and unusable.
When I got the flooring home I opened it and began laying out the pieces. There was a mix of approximately 50% small pieces less than 18 inches in length, 35% long boards and 15% intermediate. I also noticed that some of the longer boards were bowed, some bowed with the middle part up and some with the middle section bowed down. It was then that I discovered for the first time the words 'TAVERN GRADE NON WARRANTED, SOLD AS IS' plainly on the outside of the boxes.
I was told that the flooring was sold 'AS IS' and I had to sign the sales receipt noting that fact. I don't understand to this day why the bowed boards weren't pointed out to me by the salesman. I made it quite clear to him that this was my first plank style wood flooring install. I suppose there is a small chance that he didn't know, but I can't imagine them selling much of this flooring without frustrated calls from anyone who had purchased this flooring.
It also became immediately apparent that I was going to have one hell of a time trying to get this floor laid.
I called the store to tell them what I had found and of course it was made plain to me by the salesman that the flooring was non-returnable. The salesman offered to have an installer call me with instructions how I could get the bowed boards installed. I never did hear from a salesman but the manager told me that I had to weigh down the boards until the adhesive dried. Brilliant. I had already figured that out. What I needed was some trick to make this project go as smoothly as possible.
I wasn't at all happy with Lumber Liquidators but I set out to figure out how to do the install. I came up with a plan to preassemble four rows or courses and tape them together temporarily with masking tape. I could then install an entire section at a time. This turned out to work perfectly for the first preassembled section.
There were several basic rules that I had been told at Lumber Liquidators. The flooring should be laid with the boards perpendicular to the window though I am not sure now that I had that right. I was also told that the end-joints should be no less than six inches away from end-joints on the adjacent courses. I laid out the boards with this in mind placing longer boards adjacent to smaller ones.
The flooring should be laid on a clean, level moisture free surface. The flooring should be acclimated to the humidity level of the room where the flooring will be installed by opening the boxes and allowing to sit for at least 48 hours prior to installation. You should consider putting a moisture barrier down before laying the hardwood flooring. The bedroom I was remodeling had one layer of vinyl adhesive, one layer of vinyl tile and to this I added one layer of Bruce Everbond wood flooring adhesive. This should be a very effective moisture barrier.
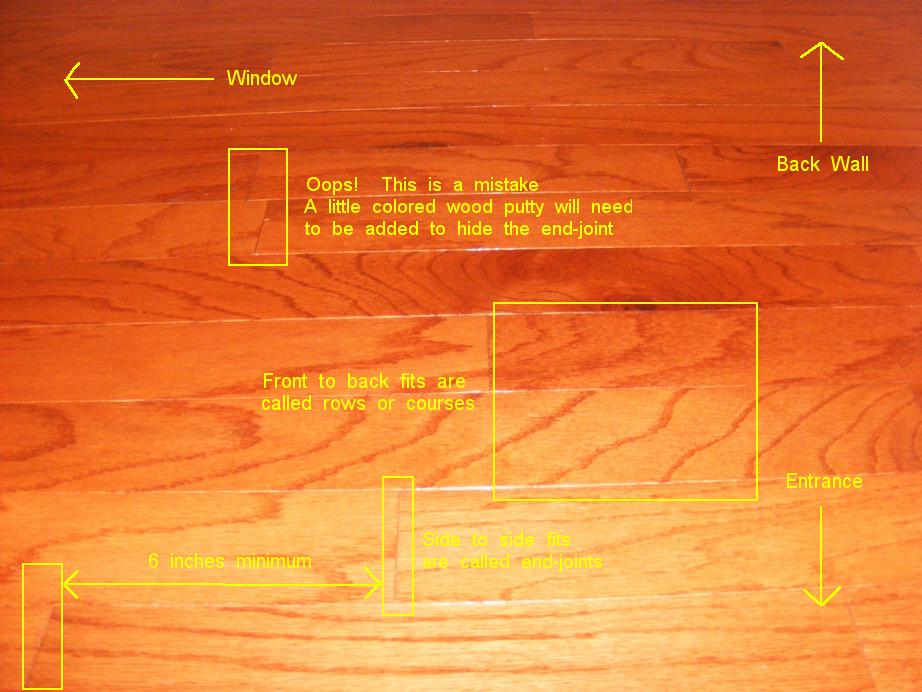
The plank flooring should be oriented so that the planks are laid parallel to the most common point of reference - normally an entranceway. The bedroom where the flooring was to be installed was approximately 10 x 11 feet with the back wall being the longer dimension. I suppose orientation is a matter of personal preference but I can't imagine having the orientation any different than parallel to the doorway.
Because of the bowing, I preassembled the planks - four board widths per section. Preassembling four courses had several advantages. First, it guaranteed that the individual boards would fit properly and snugly and that I had the cuts right. Second, it made it much easier to be sure that the all important first row of boards were parallel to the back wall. It was easy enough to move the entire section so that a small equidistant gap existed over the entire length of the back wall. Hardware flooring requires a gap between the walls, entranceways and closets although this is less of an issue in engineered flooring. A 1/2 inch gap is usually recommended, but you should talk to a professional about your particular flooring to determine the gap amount.
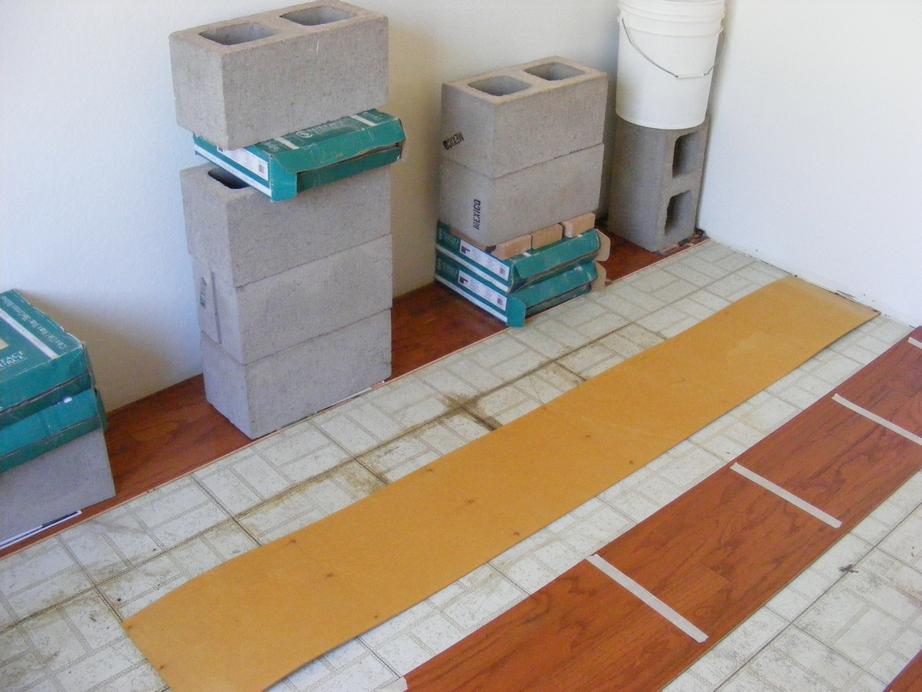
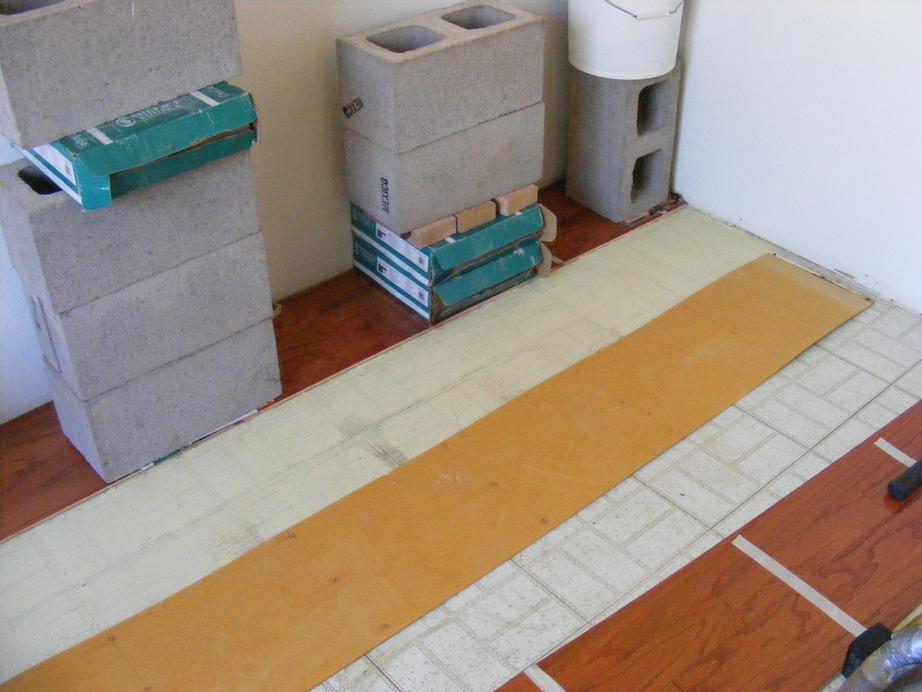
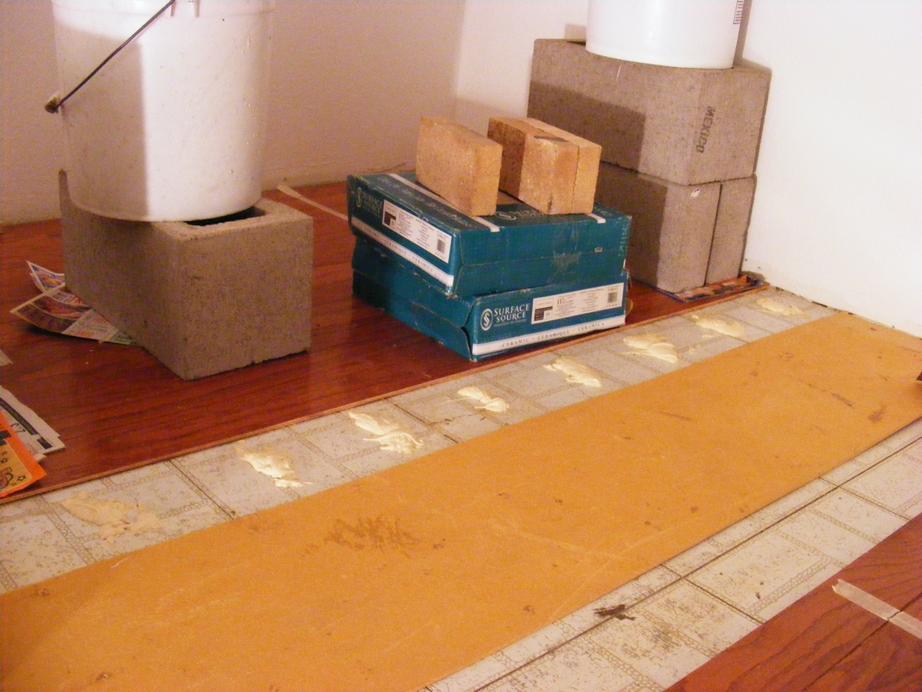
I laid out the adhesive and carefully dropped the entire preassemble section into place and arranged it. I 'walked the planks' to make sure the flooring was in contact with the adhesive and to force out any air pockets. As you can see in one of the pictures, some of the bowed boards would not stay in place without weights. I had my weights, heavy cement blocks, and some junk mail already in the room. I put down the junk mail and placed the cement blocks on top spaced approximately every foot. I was careful to place the blocks directly on top of the places where the boards were end-jointed. As you can see in the picture below, it was here were the bowed boards stuck up the most.
I had four preassembled sections ready to go, but I had a limited supply of cement blocks. I would have to wait at least 24 hours before I could install the next section.
The first round had gone so well that I thought that my strategy would work for the second preassembled section. I double checked to make sure that the groove side was facing the already installed tongue side. I laid the adhesive, maneuvered the section in place, dropped it onto the adhesive and slid it up against the first section. It was then that I discovered that I had a real problem. The grooved boards were not sliding into the tongues. I had to push on the new section to try to force it into place but that only made it harder to try to slice the section into place. I had already learned that you have 30 minutes, 45 minutes top before the adhesive begins to set. It's a challenge to work quickly without being rushed.
I got a hammer and a small section of flooring and placed it against the section. I struck the small board with the hammer trying to force the section into place. It wasn't working. There was too much friction of the adhesive over four courses to move the section. And as each minute went by the setting adhesive made it more difficult to move the section. I was sweating and banging and finally came to the realization that I had to remove the second section and scrape off the adhesive from the floor and the flooring.
This was late spring in Arizona and I was so ticked off with the failure that I left the project and empty room until November when the weather and my temper would be much cooler.
I went back to work in November and quickly realized that I would have to install each course one at a time. I disassembled my sections but left the boards in place so I could reassemble them in order. Before laying the adhesive I took a small board and slid the grooved end down the entire section of the already installed tongue edge to make sure that the boards would fit into place. I removed any excess dried adhesive with a screwdriver where the fit was too tight. It then took the tongue edge of the same scrap piece and ran it down each groove edge of the boards waiting to go into place. I didn't want to find after the adhesive was in place that the boards I was trying to install had a small sliver of wood in the grooved edge.
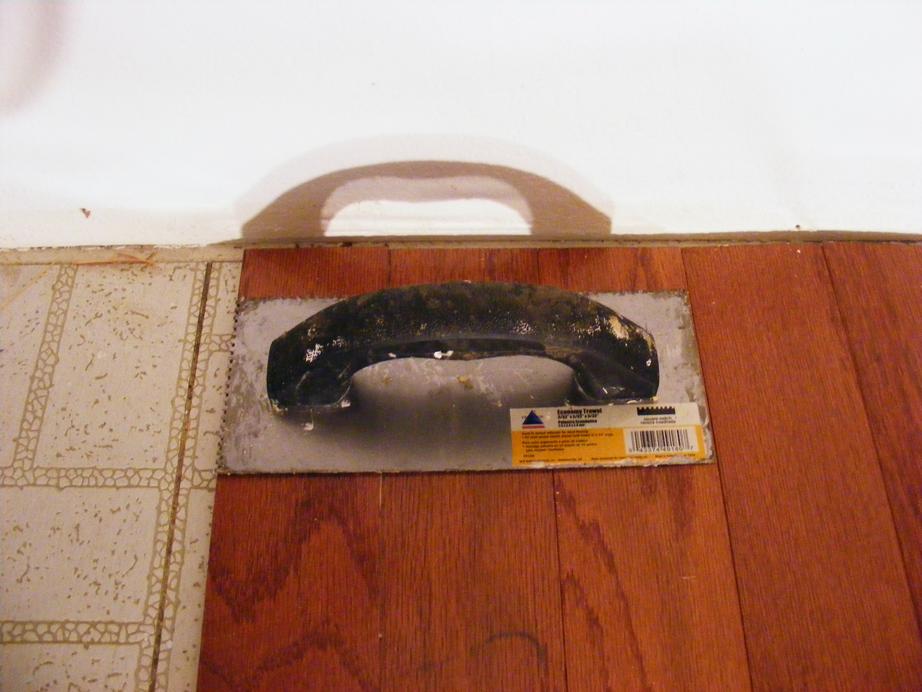
I soon learned that installing four courses at a time was a bad idea. Each board was four inches in width and the trowel I was using was twelve inches long. I put down enough adhesive to do three courses and after spreading the adhesive perpendicular to the boards, I ran the trowel parallel to the boards. This would place the adhesive exactly twelve inches wide or three board widths. It is important that you don't get the adhesive spread too far and under the area where the next tongue and groove mating will take place. It is a lot of extra work to remove excess adhesive.
I also learned that the easiest way to install the flooring was to match up the end-joints and angle the board a little bit away from the installed flooring so that the new board could be dropped into place. The idea is to minimize as much as possible how much you have to slide the newly installed board into place and across the adhesive. You have to do the best you can to push the bowed section down so you can mate the tongue and grooves. I had a small section of flooring that became my 'bang board'. When a groove refused to properly slide over the tongue, I got the bang board and hammer out. The bang board wouldn't work with four rows of flooring but it works quite well with only one row.
Important! Be sure that the newly installed flooring fits snugly up against the installed flooring and the end-joints fit snugly, leaving no gaps. Leaving a gap in the flooring front to back will introduce errors that will continue row after row. After the flooring is in place, double check to make sure there are no gaps. When walking the planks you can use your feet (wearing only socks) to push the boards both front to back and side to side. I was surprised how much slack was left in the floor when it was only hand fitted.
I had to push the ends of some boards up against the installed section and use masking tape to hold it in place. Either I had left a gap in the floor or the boards were not only bowed up and down but also slightly warped or crooked from side to side although it is more likely that the bowing caused the ends to rise up and away from the previously installed rows. As careful as I was, it was very easy to leave a gap in the flooring that I didn't discover until later. When putting the weights in place the boards could have already moved leaving a small gap and the weights covered up any gaps that might occur. This is just one more problem that I had with the bowed flooring.
Wear short sleeves or a tight fitting shirt when installing the flooring. It is easy to dip a long shirt sleeve or sweater into the adhesive when installing the flooring over the adhesive. This adhesive then gets spread onto your beautiful new floor. Don't worry if you make a mess this way. The adhesive will come off easily with a rag and some turpentine.
One other thing I would do differently is to have the groove side of the board laid and facing out. I had the tongue side facing out which meant that the boards waiting to be put in place had the groove side behind me. In the heat of the battle trying to spread the adhesive and laying the boards it is easy to step back onto a board and break the small piece of flooring above the groove.
Like my other bedroom remodel I installed ceramic tile on the window sill and in the closet.
Click on thumbnail to see a larger image
|
|

|

|
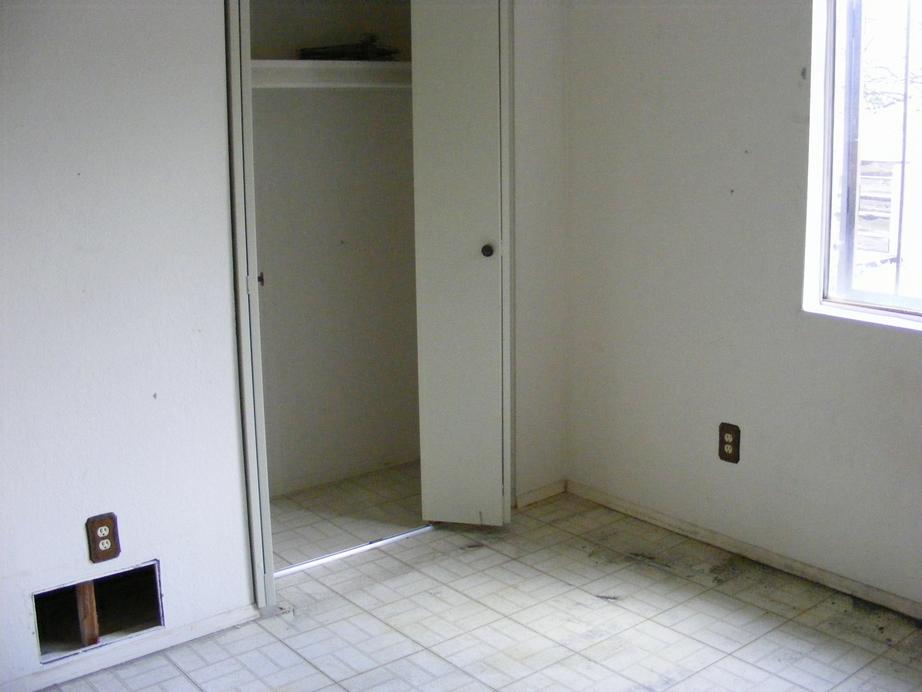
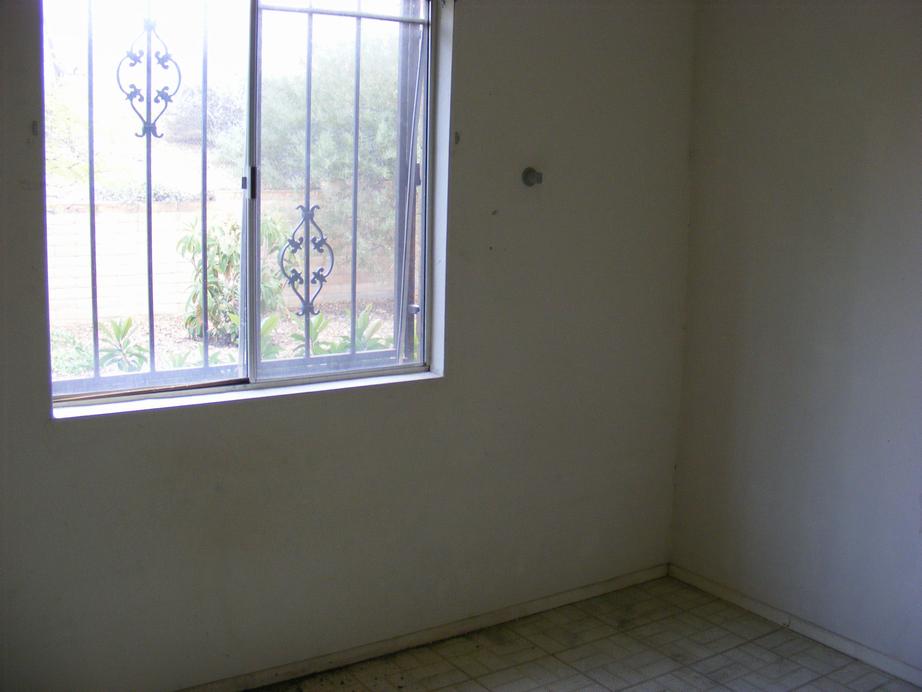
As you can see from these pictures this is one ugly bedroom. The house was purchased as a former rental and there are almost always surprises to be found. One of the surprises I found when I removed the large area carpet/rug that was left in this bedroom. The vinyl tile was in terrible shape. It had stains that couldn't be removed and heavy items had left deep depressions. I took this as an opportunity to put down much better flooring material than vinyl. Vinyl looks and feels cold. Good hardwood flooring is just the thing I needed to warm up the room. A couple coats of white paint helped enormously to brighten the room. And then I went shopping for some good hardwood flooring that I could afford.
Click on thumbnail to see a larger image
|
| |
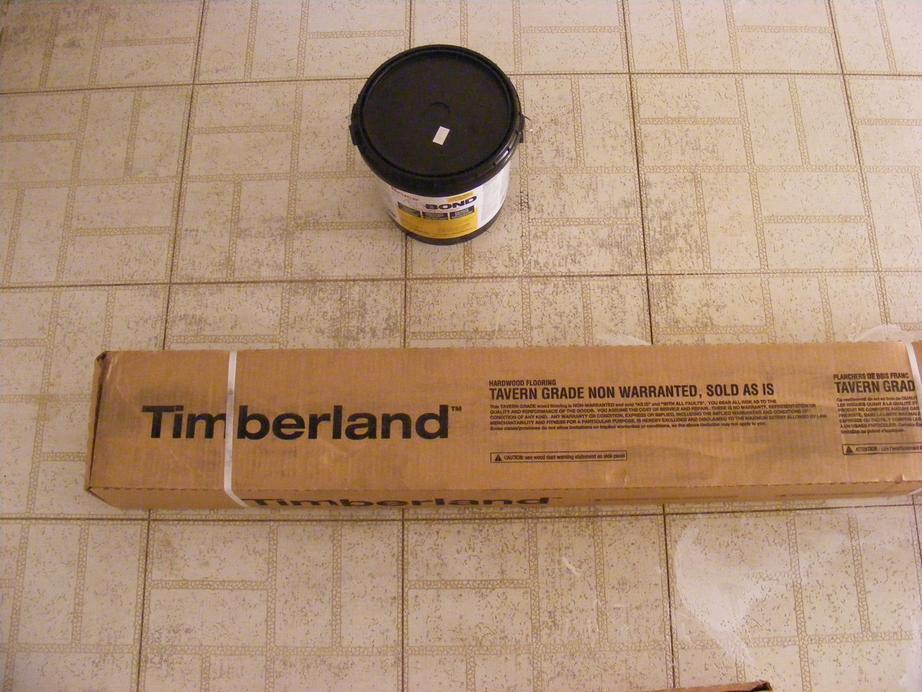
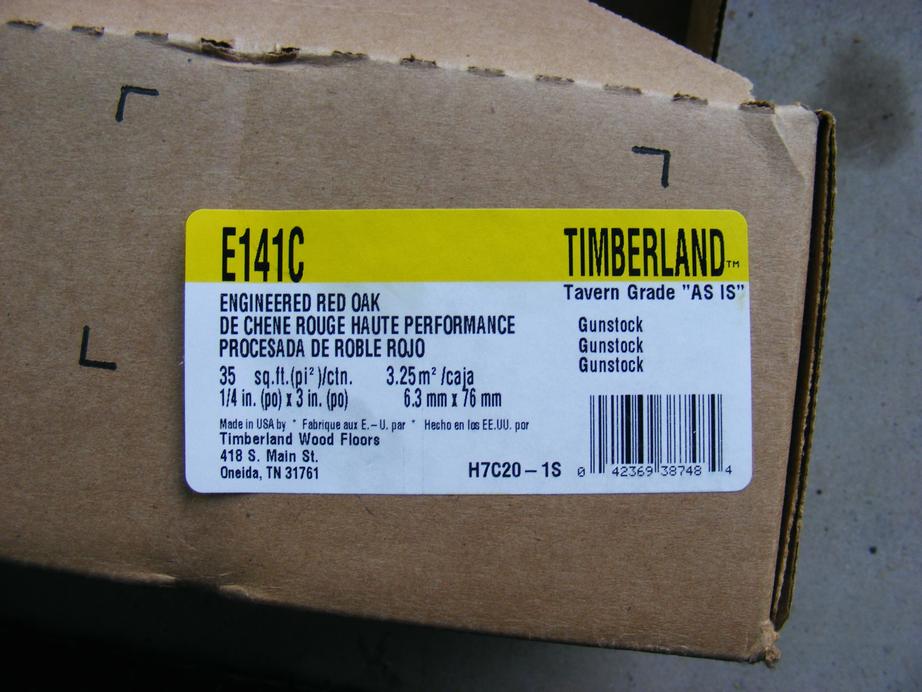
| The box clearly states 'TAVERN GRADE NON WARRANTED, SOLD AS IS' but I didn't see it until I got the flooring home. The black container is a one gallon Bruce Everbond adhesive container. I needed 2 1/2 gallons to do my 115 sq. ft. flooring project. | A closer look at the label showing Timberland TAVERN GRADE "AS IS", 1/4 in. x 3 in., 35 sq. ft./ctn. | |

|
|
|
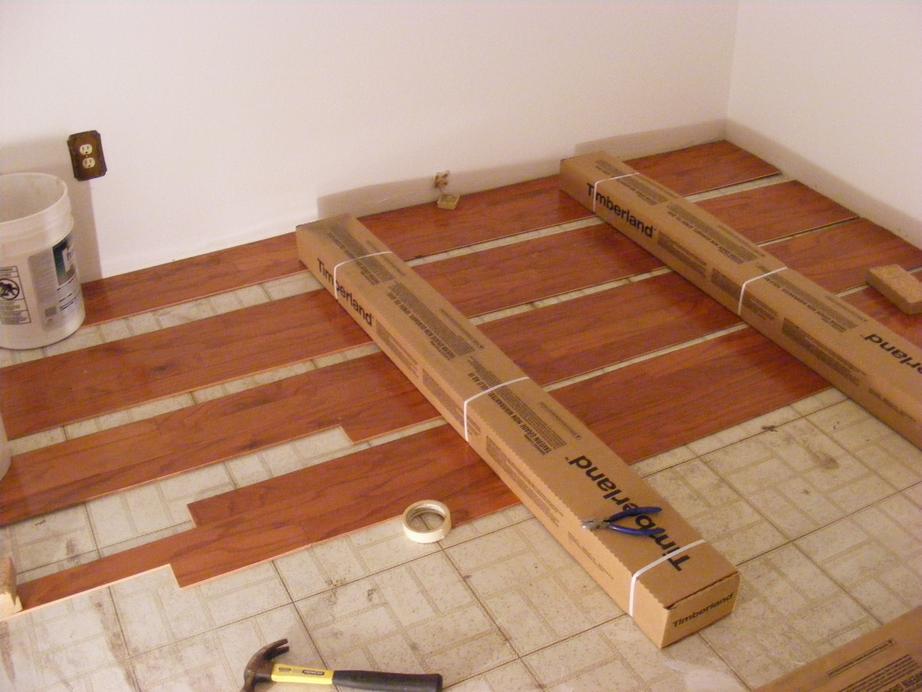
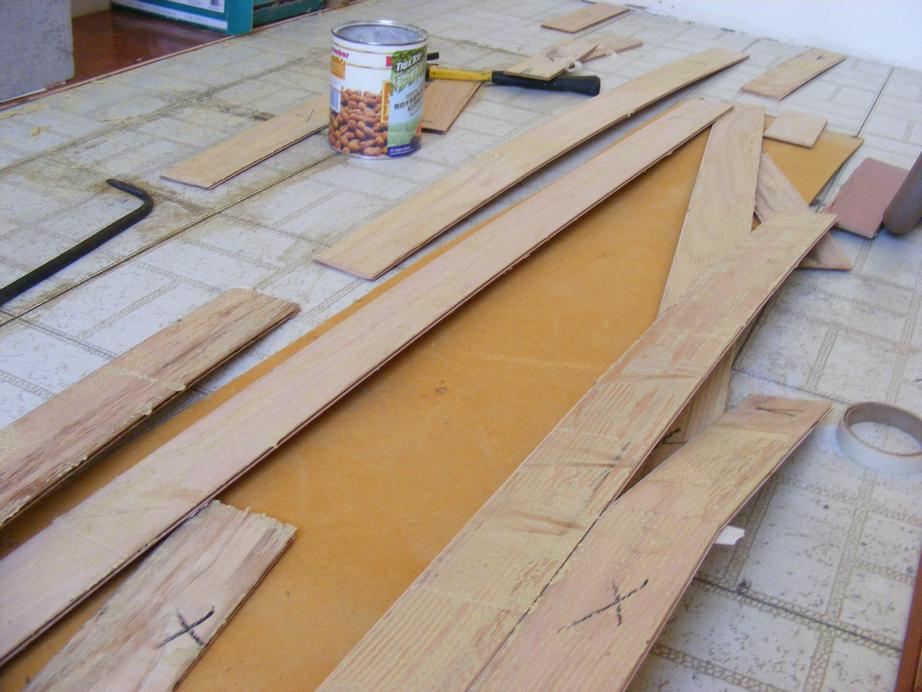
| The longer boards are bowed. Some are bowed up and some are bowed down just to make it more fun to try to install. | I laid out the boards in courses of four. This insured that the tongue and grooves would mate. It also made it simpler to verify that the end-joints were no closer than 6" from a end-joint in an adjacent row. I measured and cut the boards on the left hand side and set them in place. I soon learned that it made more sense to lay out the boards in rows of three to match the size of my trowel. Because of the quick setting time of the adhesive, you should have all of the rows cut and laid out before you begin to spread adhesive and set them in place. | |

|

| |
| My first go at laying out and spreading the adhesive. I later found a simpler way to make sure that the adhesive wasn't spread too far into the next course. | And here is a close-up of the nightmare that ensues when laying bowed boards. The end-joints don't want to properly sit down or the middle sections of the longer boards will also fail to make contact with the adhesive. | |
|
|
|
| With the first section properly aligned and in place I put my weights in place paying particular attention to put the weights over the end-joints and other places that were raised above the adhesive. | I used a pressed wood board as a guide for where the adhesive edge should be. | |
|
|
|
| After the disaster. This picture shows the boards after they were removed from the second section that would not go into place. What a mess. I removed the adhesive from the floor and left the boards to rot. I had plenty of extra flooring. Also note the 'mark of quality' on the Tavern Grade flooring. | With the trowel exactly three boards long it is easy the put the adhesive for three courses where you want it and only where you want it. Excess adhesive on the edges can make it difficult to lay the next course. Stopping and having to take the time to remove excess adhesive is time wasted. Take the time to do it right and run the trowel perpendicular to the laid flooring to simplify the install. You can also see in the picture that there is a gap between the wall and the flooring. This is important because wood flooring expands and contracts with humidity levels. | |
|

|
|
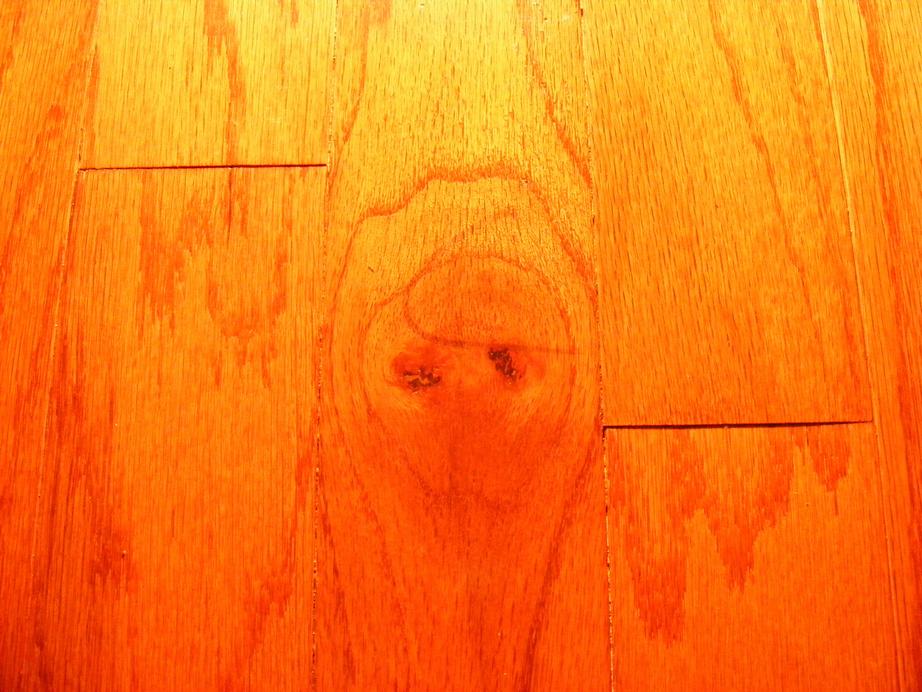
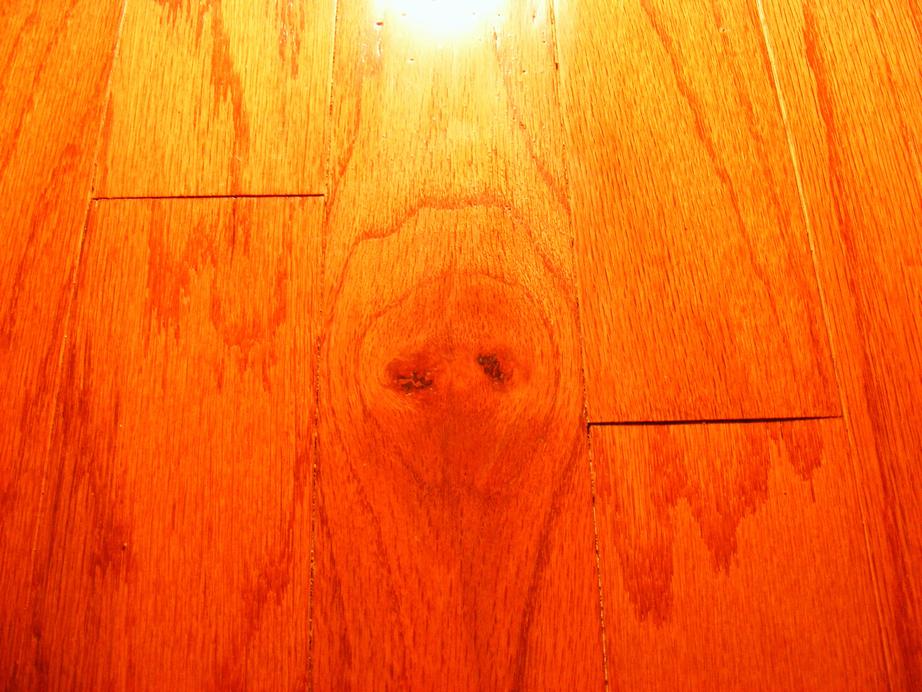
| After a little trial and error you get the hang of how much adhesive to put down. It is a little bit like putting dollops of Cool Whip on your peach pie - only a whole lot messier. Keep the container next to the area where you will be spreading the adhesive so you don't leave trails of it where you don't want it. | It is a beautiful rich wood floor made all the more beautiful by the sweat, hard work and perseverance to get the damn thing laid. | |
|
|
|
| A genius at Timberland Quality Control must have misplaced his grease pencil because he used a permanent magic marker to mark some of the boards as seconds. I didn't realize this until these magic marked boards were already laid. You can see that I left a small gap front to back in the end of this row. It isn't the end of the world though. You can add some colored wood putty and, using a putty knife, push down slightly to match the normal lines between boards. | A little bit of auto polishing compound and a little rubbing quickly removed the 'C' mark from the finish. I thought for a while that I would have a floor with a 'C' plainly visible on it. Now what could 'C' possibly stand for? | |
|
|
|
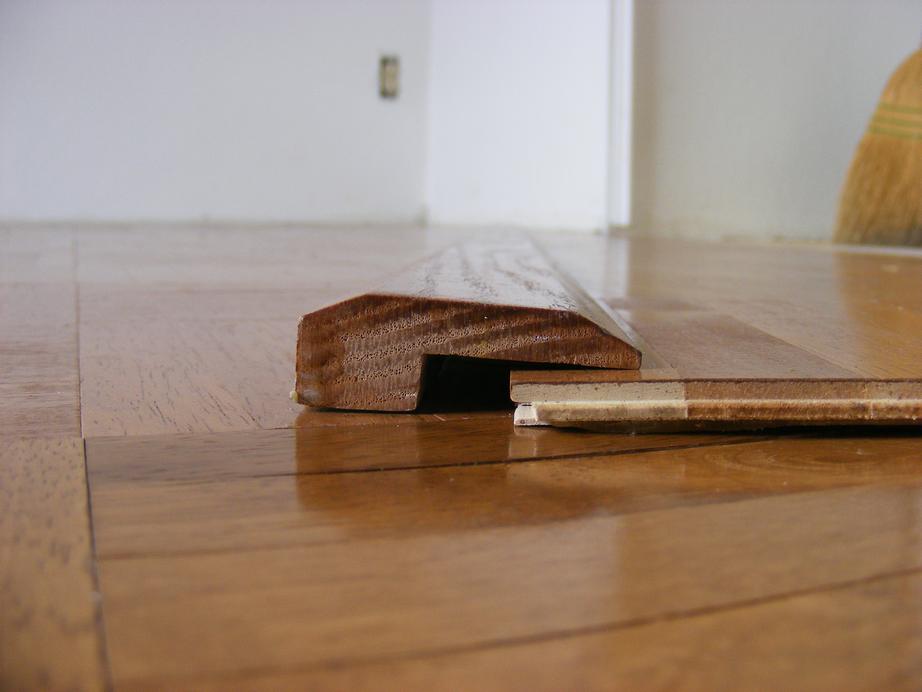
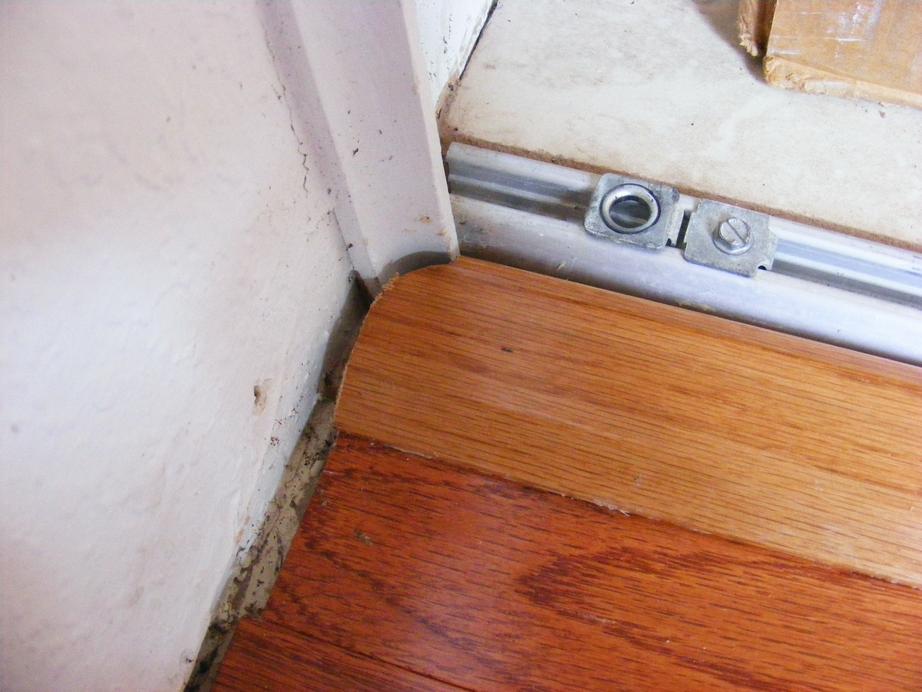
| I found a lap over transition at Lowe's that turned out to be perfect. The piece was long enough to be cut into two pieces - one for the closet opening and one for the doorway opening. This picture was taken using parquet flooring from my other bedroom remodel but the concept is valid for all wood floors. | I used an angle grinder to grind away part of the end of the lap over to match the doorway and closet molding. The lap over transition should allow for expansion. The small gap can be filled in with colored wood putty if you prefer. |
I have to say that it is a beautiful floor. That cools my ire a bit. But at $1.49 per square foot this is really expensive flooring once you figure in the extra manpower to properly lay it. I am about as frugal as it gets but I would have gladly spent the additional 50 cents per square foot for the lowest price engineered wood flooring that Lowe's was selling. This flooring should have been sold for less than half what I paid for it.
I beleive that the thin 1/4 inch boards are more susceptible to bowing. Be careful if you are buying 1/4 inch thick engineered flooring.
While a professional might be able to install this flooring much quicker and easier than I could, the salesman at Lumber Liquidators should have warned a rookie like me what problems were in store. Maybe it is unfair but I really feel like they dumped this stuff on me, the poor sucker, who didn't take the time to look closer at the flooring or the warning on the box.
Tavern Grade or 'Seconds' hardwood flooring can be installed as a do it yourself project - just don't make it your first plank style installation project. And that is my bottom line complaint about the advice I got at Lumber Liquidators. Don't make the same mistake I did when looking for flooring. If you are going to purchase any flooring marked 'As Is' without a return policy have a salesman open up a new box and take a close look at exactly what you are getting.
| Pecos SoftWareWorks Home | Contact Me | Terms of Use Rev 09/30/10 | Privacy Policy Rev 05/20/09 | About Us | Site Map |
| Tweet |
|
||
|
© Copyright 2007-2015 Alan Norton None of the content may be used or reproduced without written authorization from Alan Norton. |
|||