Custom Search
|

|
|---|
|
|
|---|
|
|
|---|
|
Custom Search
|
|
|---|
Recommended for developers:

![]()
Lesser Goldfinch family preening
![]()
LCD Vs. CRT - Do LCDs finally match CRTs in picture quality?
ECS P965T-A Motherboard
ABIT AN8 SLI Motherboard
Foxconn 975X7AB-8EKRS2H Motherboard
Foxconn BlackOps Motherboard
![]()
My misadventures flying with Allegiant Air
![]()
The Missing Post Mystery
A post I made to a Vista newsgroup was missing from the Outlook newsreader
Where did it go?
The Missing Post Mystery Revisited
It happened again! A post I made to a Vista newsgroup was missing from the Vista Mail newsreader
Where did it go?
A Case of Maxtaken Identity
When is a hard drive not a hard drive? Find out when!
![]()
Changes to the Windows 7 Taskbar You Should Know About
Vista Image Capture 'Slipstream' SP1 and SP2 into a single Vista install disc
Detailed Instructions for Reverse Integrating SP1 and SP2 into Vista
What is RAID? Some RAID Basics
RAID 5 on a Desktop PC
How to Personalize Windows Vista
Develop and Implement a Personal Backup Plan
Ten things you can do to create better documentation
(Tech Republic)
Flash Your BIOS
Three Good Reasons for Flashing Your BIOS
Ten common mistakes you should avoid when flashing your BIOS
(Tech Republic)
Find a new dial-up ISP
Sign up for 10 free hours of NetZero access!
Create a Shutdown/Sleep/Restart or Continue Icon For the Vista Desktop
What is a computer guy doing with home remodeling projects on his Website?
The Upscale Utility Room Remodel with Catch Basin and Wraparound Ceramic Tile Wall
The Bathroom Remodel for Under $1000 Project
The Do It Yourself Bedroom Engineered Prefinished Red Oak Wood Flooring Installation From Hell
Bedroom Remodel With Wood Parquet Flooring
Use Comodo Internet Security 4.0 to Lock Down Your PC Following a Windows Install or Reinstall
![]()
The Northstar Horizon Microcomputer
![]()
Round-Tailed Ground Squirrels

Prairie Dogs

American Kestrel Falcons "Sparrow Hawk"

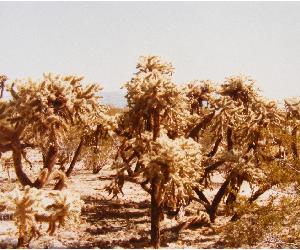
Arizona Sonoran Desert
Arizona Sunsets

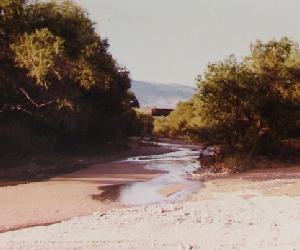
Cienega Creek
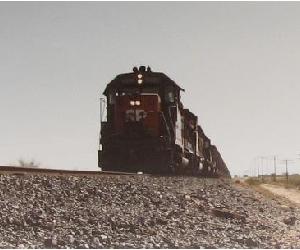
Trains In the Desert
Desert and Mountain Flowers

Fox Squirrels

![]()
The Other Reason Why Your Irrigation Valve Might be Leaking
My Response to the Newegg Affiliates Program Changes
Playing the Rebate Game
Know the Rules Before You Play
Vista Confusion
The four questions you need to ask before buying Vista

Click on thumbnail to see a larger image
|

| |
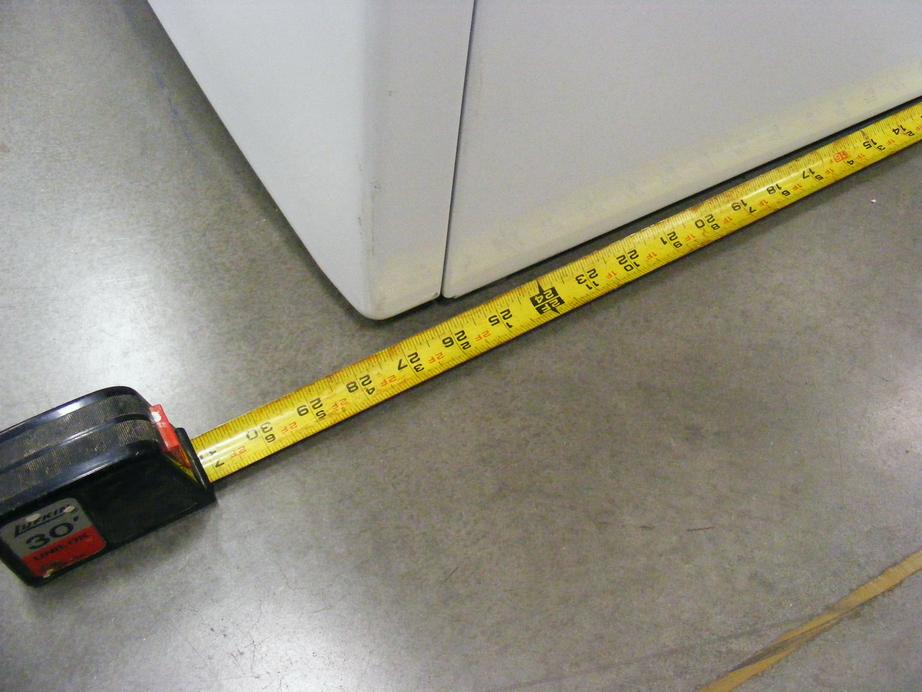
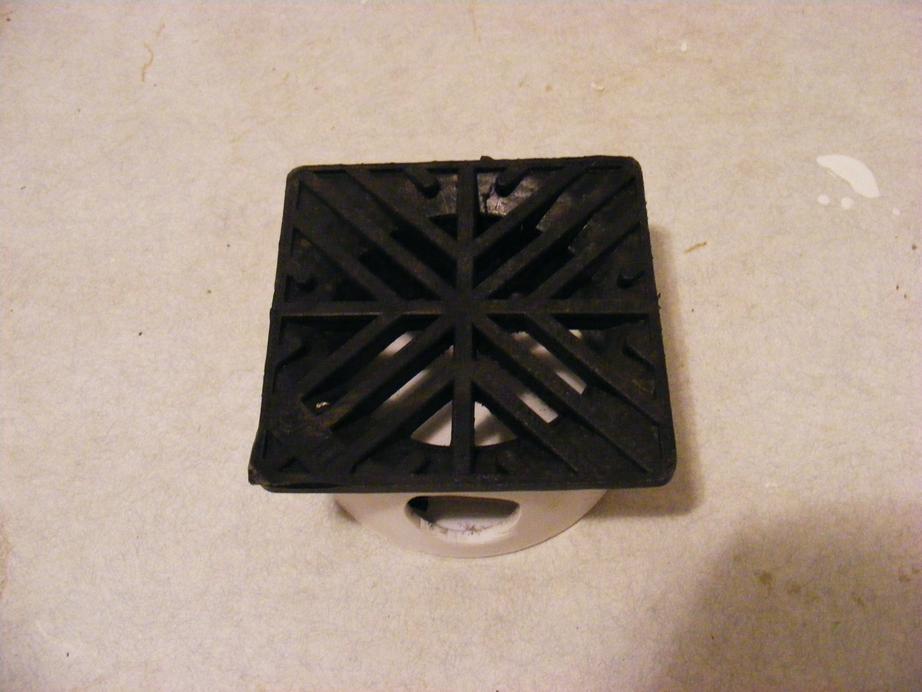
| I made a trip to my local Lowes to measure the deepest washer. I needed to get an idea of what kind of modern laundering monster could be placed onto the basin by some future owner. The Lowe's salesman no doubt thought I was nuts when I told him what I was doing. He did kindly say that I was in the right place. The front loading washers were the deepest he had. I didn't take this picture to put on my Web site. I just didn't want to trust my memory. | I found a PVC cup at the Home Depot that I could use for the bottom of a drain. They had a black PVC(?) drain cover the fit perfectly into the shallow drain bottom. I had to cut a hole for a 3/4 inch PVC drain pipe but that was easy enough. A little less obvious was the work needed on the drain grate. I had to cut a section out that could fit over the drain pipe and allow the drain cover to be removed, if needed, sometime in the future. This required a slot to be cut large enough to fit over the 3/4 inch drain pipe and not a simple hole. See the full sized picture by clicking on the thumbnail above to get a better view. | |
|

|
|
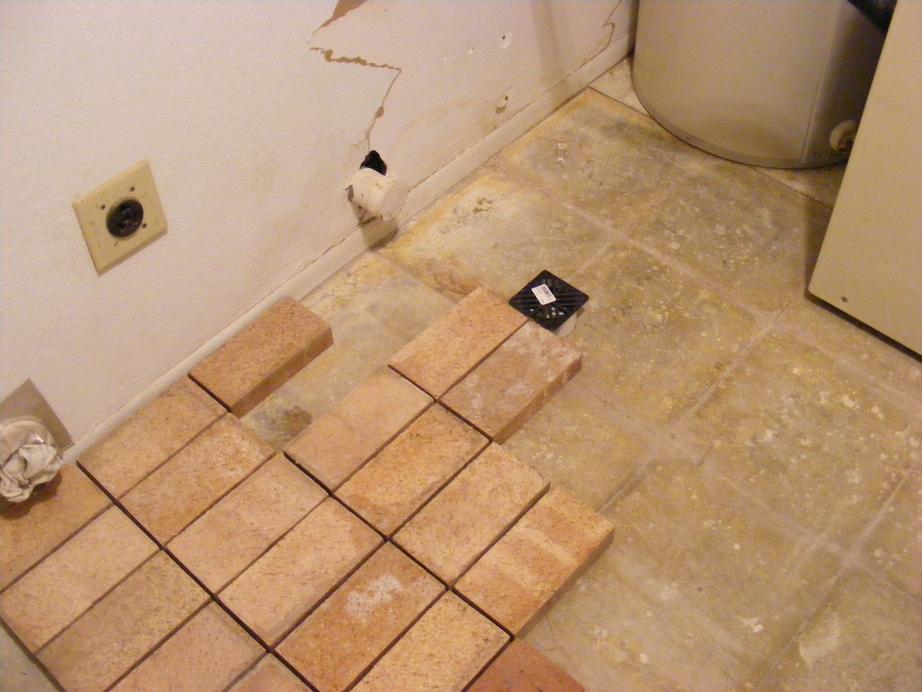
| The black drain cover fits neatly over and into the shallow cup used for the drain bottom. | I tried a number of layouts. | |
|
|
|
| Another test layout. | The layout finally takes shape. | |
|
|

|
|
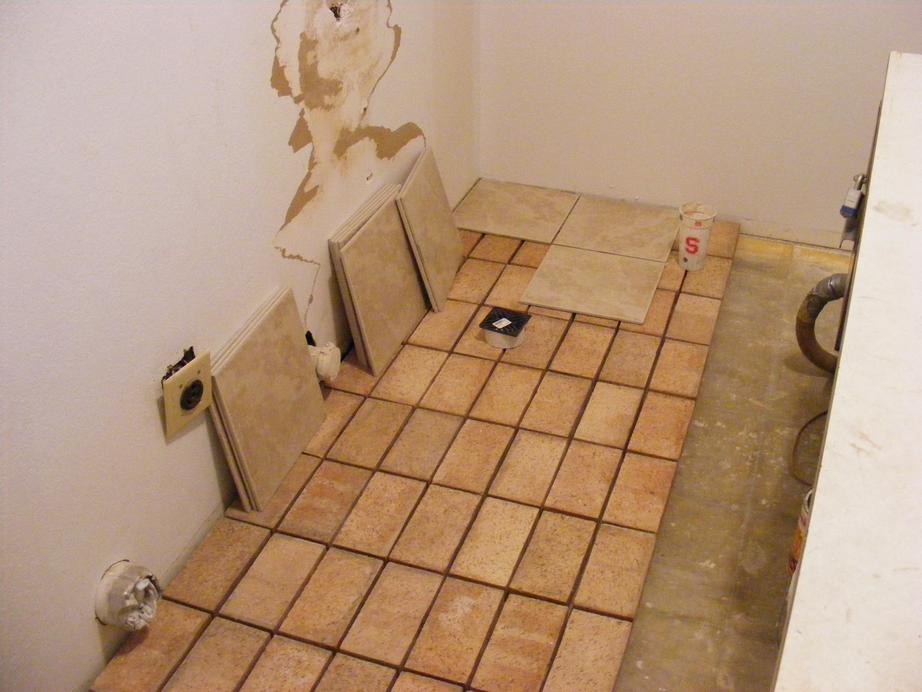
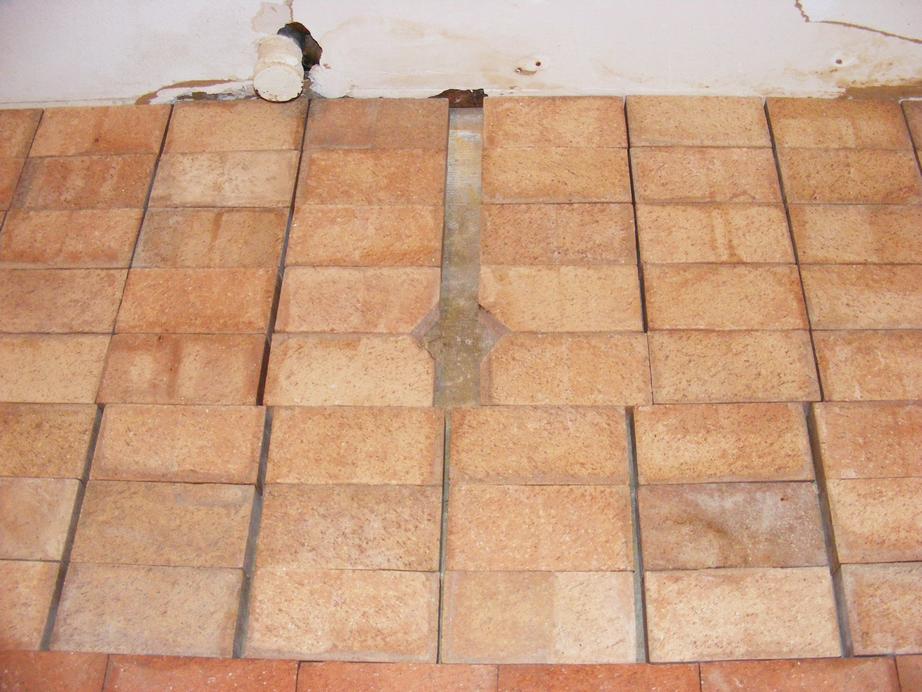
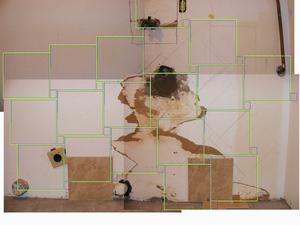
| I include this picture because it gives a good view of the whole catch basin and how I originally envisioned the wall tiles meeting the basin and the ceramic tile that would go on the perimeter top. | I used masking tape to mark where the pavers need to be cut for the drain. You can also see how I staggered the layout of the first three rows to make up for the extra width of the drainpipe. | |
|

|
|
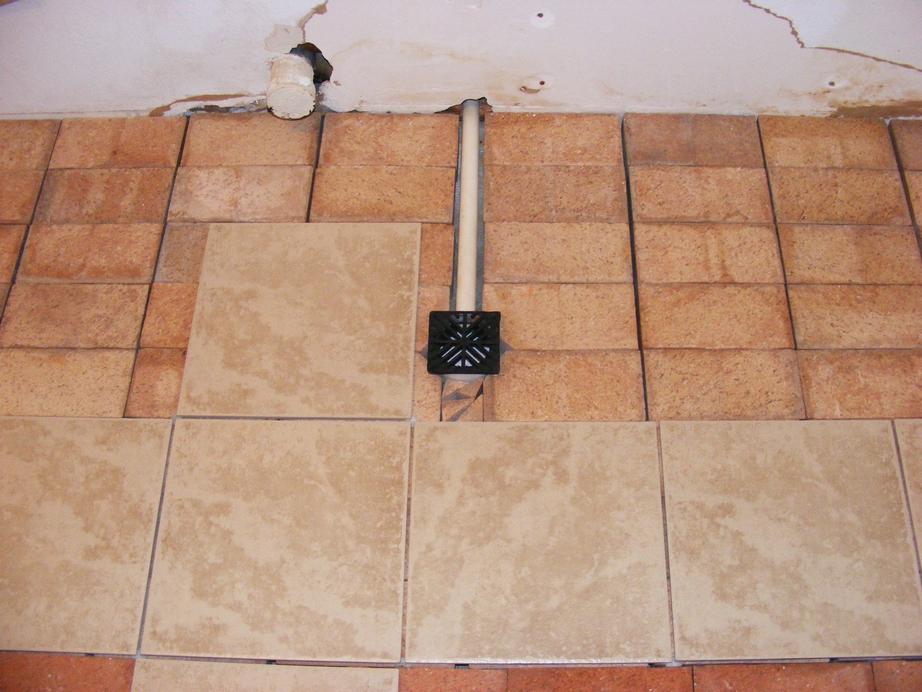
| The pavers in place after cutting. | The drain fits nicely in place. The four corners cut off the pavers were used to fill in the small gap in front of the drain. | |
|

|
|
| I realized at the last moment that the tiles had been placed so that I would have to make a square cut in the middle of a tile. That wouldn't do. This picture also shows the 3/4" drainpipe in place and obviously, the hole already cut through the wall. You can't see it in this picture but the drainpipe is directly below the washer drain, but the washer drainpipe must veer to the left and connect to the sewer cleanout (the pipe just above and to the left of the catch basin drainpipe). I was very careful not to cut into any drainpipes, water supply lines or electrical lines. | I adjusted the pavers and tile so that the ceramic tile would be next to the drain, greatly simplifying the tile cutting job. You can also see the pieces from the four corners of the cut pavers put in place in front of the drain. | |
|
||
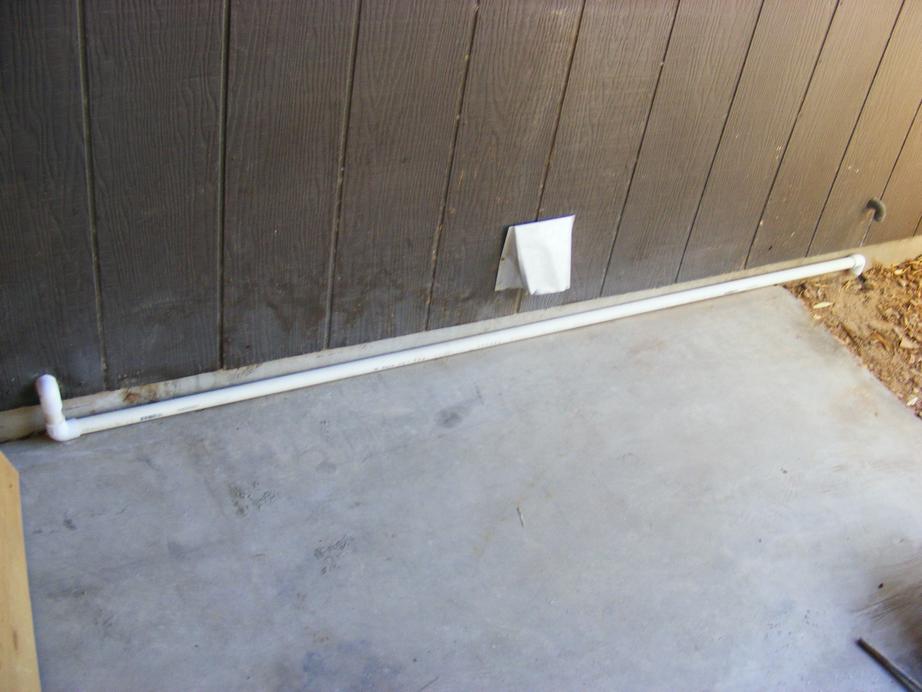
| The drainpipe ends up outside and off the patio where it is allowed to drain. If you want to attach the drain to the sewer system, you may be required to get a building permit. |
I wish I could say I had the design of the catch basin all figured out in my head from the start. The fact was that I spent a lot of time moving pavers about trying to get some idea how best to lay out the pavers. I wanted to lay out the pavers so the tiles could be easily set. I tried a number of layouts before I decided on the final layout. In part I was just being careful. In reality I was just postponing the heavy work ahead. Even after all the care I had taken I almost positioned the drain in the middle of a tile. I needed a small adjustment to get the drain aligned with a tile edge and between the paver columns.
I took a trip to the local Tucson Lowe's to measure the deepest washer and dryer that they had. I found that the deepest washer was a little over 27 inches. A sewer cleanout pipe on the wall extended three inches. I decided that the catch basin would be 32 inches deep. This would allow for a larger washer and dryer with four to five inches in the back for dryer vent hoses, washer hoses and washer drain pipes.
The width of the catch basin was determined by measuring the water heater and research the washer and dryer widths on the Internet. I found that almost all washer and dryers were 27 inches wide. After adding up the numbers I found that they were close enough to seven feet that I would use seven 12x12 inch tiles to cover the width of the catch basin. You have to allow for the 3/16 grout joints. I simply laid out the seven tiles separated by the 3/16 inch spacers to determine the left edge of the basin where the slightly larger perimeter pavers would go.
I had everything that I needed to set the pavers in place. I considered going out 36 inches plus the spacer widths for the depth but when I laid out the pavers the extra four inches made a big difference. The catch basin would stick out too far into the utility room. This meant that I would have to cut four inches off of the seven tiles against the wall, but what were seven more cuts? I knew that I would be making more than 100 cuts.
Looking back on it now, I should have started with the physical dimensions, width and depth, before messing with the paver layout. The physical dimensions determined what the layout would look like. All that had to be done then is fit the pavers to the predetermined width and depth.
I needed to decide next where the drain would go. Somewhere under the washer made the most sense. I chose a place between two columns of pavers and on the edge of one of the tiles. This way I didn't have to cut the pavers. I could also easily cut the tile. Cutting a square from the edge of the tile is simple compared to trying to cut a square out of the middle of a ceramic tile. There is one more important consideration. The drain has to be placed so that it will not intersect with something important in the wall - like a washer drain or copper supply lines. Your day can be ruined very quickly if you cut into a wall and water comes rushing out.
As the pictures show, I had to cut the corners of four pavers where the drain would go. This was the only cutting I needed for the pavers. The three rows of paver in front of the drain were staggered to span the extra distance that needed for the drain pipe. This left a slightly larger gap between the pavers in the first three rows but I didn't consider this a problem. I was going to use tile-set to cover the pavers, drainpipe and fill in the gaps between the pavers.
|
|
|
|
|
| Pecos SoftWareWorks Home | Contact Me | Terms of Use Rev 09/30/10 | Privacy Policy Rev 05/20/09 | About Us | Site Map |
| Tweet |
|
||
|
© Copyright 2007-2015 Alan Norton None of the content may be used or reproduced without written authorization from Alan Norton. |
|||