Custom Search
|
|
|---|
|
|
|---|
|
|
|---|
|
Custom Search
|
|
|---|
Recommended for developers:

![]()
Lesser Goldfinch family preening
![]()
LCD Vs. CRT - Do LCDs finally match CRTs in picture quality?
ECS P965T-A Motherboard
ABIT AN8 SLI Motherboard
Foxconn 975X7AB-8EKRS2H Motherboard
Foxconn BlackOps Motherboard
![]()
My misadventures flying with Allegiant Air
![]()
The Missing Post Mystery
A post I made to a Vista newsgroup was missing from the Outlook newsreader
Where did it go?
The Missing Post Mystery Revisited
It happened again! A post I made to a Vista newsgroup was missing from the Vista Mail newsreader
Where did it go?
A Case of Maxtaken Identity
When is a hard drive not a hard drive? Find out when!
![]()
Changes to the Windows 7 Taskbar You Should Know About
Vista Image Capture 'Slipstream' SP1 and SP2 into a single Vista install disc
Detailed Instructions for Reverse Integrating SP1 and SP2 into Vista
What is RAID? Some RAID Basics
RAID 5 on a Desktop PC
How to Personalize Windows Vista
Develop and Implement a Personal Backup Plan
Ten things you can do to create better documentation
(Tech Republic)
Flash Your BIOS
Three Good Reasons for Flashing Your BIOS
Ten common mistakes you should avoid when flashing your BIOS
(Tech Republic)
Find a new dial-up ISP
Sign up for 10 free hours of NetZero access!
Create a Shutdown/Sleep/Restart or Continue Icon For the Vista Desktop
What is a computer guy doing with home remodeling projects on his Website?
The Upscale Utility Room Remodel with Catch Basin and Wraparound Ceramic Tile Wall
The Bathroom Remodel for Under $1000 Project
The Do It Yourself Bedroom Engineered Prefinished Red Oak Wood Flooring Installation From Hell
Bedroom Remodel With Wood Parquet Flooring
Use Comodo Internet Security 4.0 to Lock Down Your PC Following a Windows Install or Reinstall
![]()
The Northstar Horizon Microcomputer
![]()
Round-Tailed Ground Squirrels

Prairie Dogs

American Kestrel Falcons "Sparrow Hawk"

Arizona Sonoran Desert

Arizona Sunsets

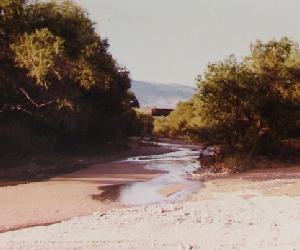
Cienega Creek
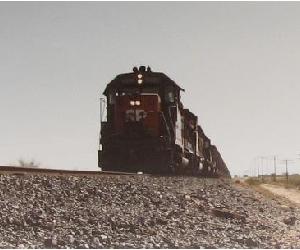
Trains In the Desert
Desert and Mountain Flowers

Fox Squirrels

![]()
The Other Reason Why Your Irrigation Valve Might be Leaking
My Response to the Newegg Affiliates Program Changes
Playing the Rebate Game
Know the Rules Before You Play
Vista Confusion
The four questions you need to ask before buying Vista
It always happens. I touch a plumbing fixture and it begins to leak. Remove a copper flex pipe or two to the water heater and you have an instant project. My house is now 30 years old. I guess I should expect problems with the plumbing after that long.
It just so happens that I hate fixing plumbing problems. I hate plumbing with a passion. That always leads to shortcuts hoping that I can remove a fixture and replace it later without leaks. It never works out that way. I will warn you now that I consider myself a terrible plumber. I will tell you the inevitable plumbing problems I had with the utility room remodel but take any of my plumbing advice with a grain of salt.
Note: Local building codes may require a building permit for work done on any type of water heater. Check the codes in your area before doing any water heater replacement or repair.
Actually, I had removed an old electric water heater in 2001 and replaced it with a new one without any leaks through some sort of divine intervention or providential miracle. No such luck this time when I tried to reinstall the water heater. The connector at the water heater end leaked and no amount of tightening would stop the leak. Both the cold and hot water lines leaked and, as usually happens, further tightening made the leak worse. The copper flex pipe was soldered on the wall side. I decided to get out the propane torch, heat up the solder joint and sweat the pipe off. I did this reluctantly. Using a propane torch to sweat off a pipe scares me to death. I can envision myself with the water turned off, a pipe that I can't get on or off and a leak that requires a plumber to fix before I can have the water turned back on. And asking for help from a plumber just won't do.
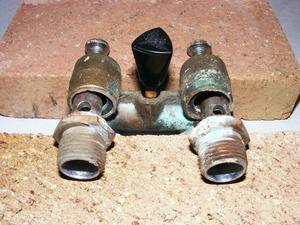
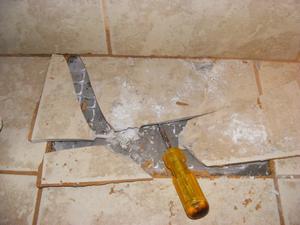
I removed the hot water flex pipe. There was a shut-off valve on the cold water side so I could have chosen either. The hot water flex pipe was easier to get to. I have been a bad plumber for long enough to take the time to see exactly what I had here. What I had was a WaterFlex copper pipe with a connector that had a cone shaped fitting between the inner pipe and the outer connector inner lip. It looked to my untrained eye that I needed a cone shaped washer that would make contact with the inner pipe.
With the copper flex pipe successfully removed I set out on the journey to the local Ace hardware store to complete the simple task of finding two replacement washers for my flexible piping. They had no such washer. I was sent to Naughton's, a local plumbing supply store here in Tucson. They didn't have the replacement washers either but offered to sell me two new water heater flexible copper supply lines for $25.00. I told the kind gentleman that I only needed two 25 cent washers. He sent me to Appliance Parts Depot with a 10% discount coupon.
The friendly and helpful man there told me that they no longer stocked any water heater parts. I left headed for the local Home Depot. On the way I stopped at another Ace Hardware out of sheer desperation. It is the largest Ace Hardware in Tucson. They didn't have what I needed either.
I ended up at Home Depot with the miserable part in tow. I know it looks silly carrying an old part around even at Home Depot and I guess that I am not too surprised that I never see any other poor souls carting around a plumbing part or two that needs to be replaced. I found the plumbing guy. I asked him point blank, "Do you know what I've got here?" He took a quick glance and immediately said "I know exactly what you've got there. I'm a plumber!" Finally an expert in the dark arts of plumbing!
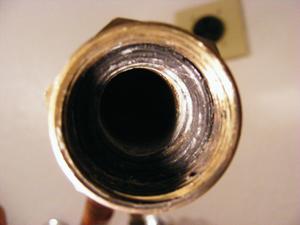
The WaterFlex flexible copper water line inner pipe sits below the lip of the connector requiring a special washer
He explained to me that the WaterFlex connector/washer is proprietary so that plumbers can make a lot of money replacing them or fixing them. He said I might be able to order a replacement washer from a specialty plumbing shop. It was Saturday afternoon and I had enough of a plumbing adventure for one day. I told him "Just tell me what I need."
He went to the copper fittings section and handed me two 3/4" male adapter fittings. One side, the female side, would be soldered onto the existing wall pipe. The other male side was threaded to accept a threaded connector. He told me this would allow me and anyone following me to simply unscrew the copper flex pipe to replace it. That made sense, I thought. He then found and handed me two new 18" Watts brand flexible copper lines. Both ends had threaded female connectors and, joyfully, two simple standard washers inside the connectors. $29.02 later I had my '25 cent replacement washers'.
I purchased the parts reluctantly. Not only were they expensive but it also meant that I had to sweat and remove two more fittings and then sweat two new solder joints. These things never go well.
I realized when I got home that the hot water side was fairly straightforward. I had already removed the old line so all I had to do was sweat the new copper adapter into place. The cold side was a problem. There was a shut-off valve on the cold water side and it needed a male fitting to connect to the female connector on the valve. I decided that I needed a small piece of 3/4" copper pipe to make the female to female connection. I didn't have any but I did have the old WaterFlex lines. I could cut off a piece of that to use between the valve and the adapter. It meant one more solder joint. Things were already not going well.
After cutting off a small 3" piece of 3/4" copper pipe I sweated it into the valve and then sweated the copper adapter on. I should take a moment to explain how to seat a good solder joint - at least as I, the bad plumber, understand it. You need to have no water present. Turn off the main water line valve and open up the lowest water fixture. This is usually the water spigot outside. First, you need a clean, bright piece of copper. Use a fine piece of sandpaper to burnish the pipe ends. Next, place copious amounts of solder flux inside the female connector and on the male end of the copper pipe. Fire up a propane torch, and this is the important part, heat up the female or receiving end of the joint. In this case it was the female valve connector and the female adapter connector. It requires a lot of heat and at least a minute before the connector will be heated enough to accept solder. While heating the connector, place the solder at the top of the connection making sure that the solder is not being heated directly by the torch. When the perfect temperature is achieved, the solder will magically flow into the connection. You know you have added enough solder when it drips from the bottom of the joint. A small bucket of water under the joint can be used to catch any molten solder dripping from the joint. The most common mistake that I myself made early on is not getting enough heat to the joint. You need a large flame from the torch to get the right amount of heat.
Caution! Always use eye protection when sweating a solder joint.
Now that is how I have learned in my vast plumbing experience to properly sweat a solder joint. During my solder misadventure on this plumbing Saturday I made two mistakes. First, I forgot to burnish the old copper pipe.
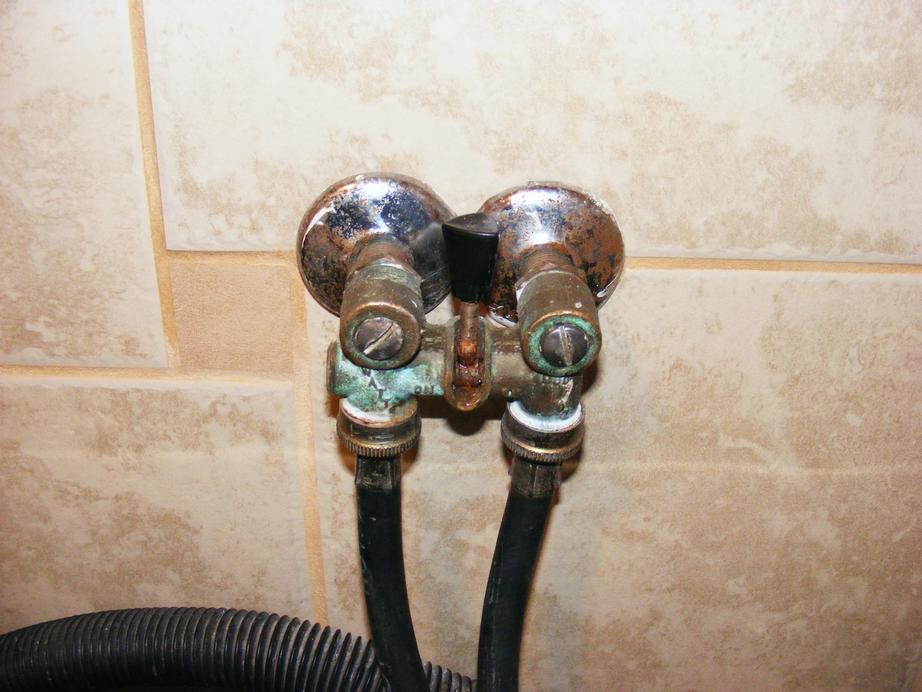
The second mistake was less obvious. After all three solder joints had been completed I took an old copper flex line that I had laying around and connected the cold water line directly to the hot water line. This would test my solder joints.
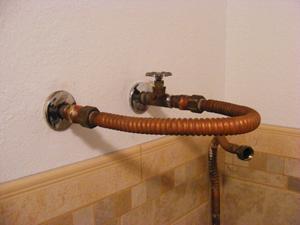
Testing the three solder joints from the hot water line and cold water line
The hot water side seemed fine but the cold water line leaked. I had real problems trying to get the connector soldered onto the copper pipe. I needed three hands - one to hold the propane torch, one to hold the solder and one to hold the wrench to keep the connector pushed into place. The connector was not far enough onto the copper pipe. But I didn't have a third hand to push it fully in place onto the copper pipe. I learned a new trick while fighting to get the connector on. I kept the torch on the connector past the magic solder melting point. This allowed me to put down the torch, hold the solder in one hand and push the connector into place with the wrench in the other hand. The extra heat is enough to give you the time to get the solder flowing into the joint.
The joint seemed solid but after testing I found that it still leaked. After several more tries to get the solder to flow properly into the joint, I ran out of solder and had to make an emergency trip to Ace Hardware to get more. When I returned, solder in hand, reason returned to the mind of the 'bad plumber'. I sweated off the short copper pipe from the shut-off valve and sweated off the copper adapter. When it had cooled I noticed that the piece of copper pipe I had cut off the old flex line had a small indentation from a wrench that had been used on it by some unknown plumber. I improvised and found a socket from a socket wrench set that fit exactly inside the 3/4" copper pipe. I forced the socket and socket extension through the pipe with a hammer. The indentation disappeared. I resoldered the joints, reconnected my test flex line and tested the joints. Success! I had once more somehow created three good solder joints thus avoiding the dreaded call to the local plumber!
My second mistake was not inspecting the 3/4" copper pipe for damage.
My plumbing misadventures did not end there. Oh no! There was still the single-handle washer shut-off valve that needed to be replaced. I had obtained one from Home Depot making sure that the hot and cold water lines were exactly 2 1/2 inches center to center. One can't be too careful when it comes to plumbing. As it turned out, that is exactly what Home Depot had.
The shut-off valve came with two copper connectors that connect directly to the valve. Two screws connect the valve to these connectors. I didn't want to have to sweat off the old connectors after my last soldering adventure. There was no shut-off valve on the pipes leading to the washer so I was in deep camel dung if the soldering went awry.
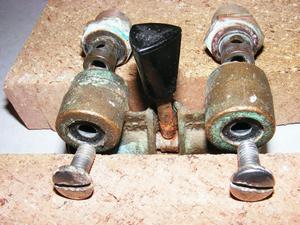
The screws connect the single handle Watts brand washer shut-off valve in this exploded front view
The connectors that connect to the hot and cold copper lines fit inside the valve and attach to the screws
I turned the water off at the main. I removed the screws from the old valve and then the valve itself slipped easily off the connectors. I put the new valve in place onto the old connectors. I put the screws in place, tightened them and turned on the water. The result was a spray of water everywhere on the cold water line side.
I then spent the better part of an hour trying to wind Teflon plumbers tape (or more accurately TFE or PTFE tape) around the screw. Teflon tape is without a doubt the greatest invention ever made for bad plumbers everywhere. I had success with the hot water line but the cold water line still leaked. It was then, as it usually happens, when I was tightening the screw on the cold water side of the valve when disaster struck. The screw had stripped the threading on the connector. The screw came out and water was blasting straight out the hole onto my new ceramic floor and out the carport door! After fumbling for half a minute trying to get the main water valve shut off, I finally got the valve turned off and returned to survey the damage. Most of the water had gone straight out the carport door.
I cleaned up the remaining water on the floor and went back to look at the offending washer shut-off valve. It was obvious that I had ruined the copper connector on the cold water side. Even though it was getting late, I committed to sweating off the old connectors. UGH! It didn't take very long to sweat the old connectors off and replace them with the bright and shiny new copper connectors. The hot water side went on with no problem. The cold water side was more problematic. I once more saw visions of a $100 plumbing bill in my future. I did finally get it on. I noticed during the process that the stems with the holes of the new connectors were a slightly different size than the stems of the old connectors. I made sure that the ring washers were in place on both sides of the valve and screwed the valve into place. To my utter astonishment, not only had I made two good solder joints, but the leaks around the screw holes had also stopped.
Once again my shortcut had cost me a lot of lost time and grief. Fortunately there was no water damage. I am very conscientious when it comes to a remodeling project. My problem as a bad plumber is that I hate plumbing so much that I always want to take the easy way out.
My plumbing nightmare was still not over. The electric GE water heater would overheat and the emergency 'Therm-O-Disc' shut of button would pop, shutting down the water heater. This problem began 13 months after the purchase of the water heater. The full parts and labor warranty was 12 months. Isn't that always when these things happen? I had simply plugged in the water heater in when I needed hot water. That wasn't very often. I only needed hot water when washing clothes and when taking showers in the winter. A cold shower in the summer in the desert is a pleasant experience! I did save a lot of money by not keeping hot water in the water heater tank 24 x 7 but with a beautiful new utility room, it was time to move into the modern age and get the water heater fixed. In the modern era you are considered crazy if you don't keep at least 40 gallons of hot water sitting idle in a tank at least 30 feet from the closest hot water fixture. I will let my hot water sit idle where it is reheated over and over until I need it - at least until I get the next electric bill.
I found that the thermostats for the GE water heater were a lot less expensive than I thought. Warning! Hot water heaters run on 220 Volts AC. If you are not sure what you are doing trying to fix an electric water heater seek a professional. Gas water heaters should always be fixed by qualified professionals who understand and follow repairs according to your local codes. If you do know what you are doing and want to fix the electric water heater yourself, always unplug the water heater and verify it is not electrified before continuing.
I ended up replacing both the upper and lower thermostats. It wasn't until I replaced the second upper thermostat that I discovered that two of the copper wires were corroded. It may not have been a thermostat problem after all but with my extensive knowledge of electric hot water heater themostats, who knows. I cleaned up the two copper wire leads with some fine sandpaper. The water heater seems to be working fine again. If you have a problem with your electric hot water heater, disconnect it from the power supply and check the copper wire leads for corrosion before replacing the components.
Click on thumbnail to see a larger image
|
| |
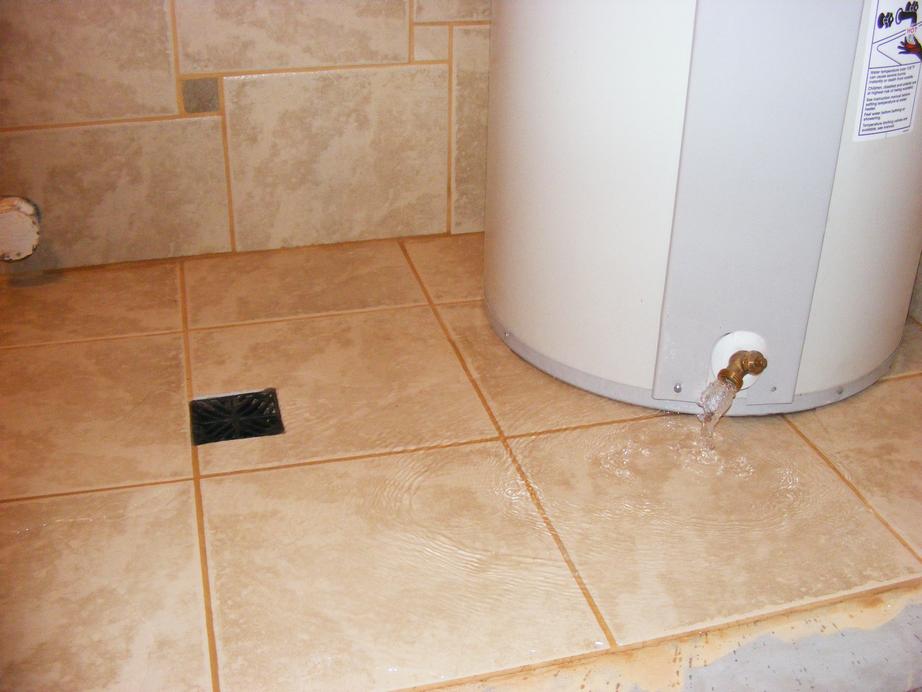
| This is a picture of the old Watts washer single handle shutoff valve. It leaked at the handle and from the connectors. | I had left the water heater drain open. When turning on the water to the water heater I had an impromptu test of the catch basin and drain. The drain was able to handle this amount of water with no problem. I then disconnected the water heater from the water supply lines and made sure the bottom of the water heater was dry. I also painted the bottom with a coat of paint and let that thoroughly dry before putting the water heater back in place. Water under a water heater can quickly rust the bottom and it takes a surprisingly long time for the water under a water heater to dry. | |
|
||
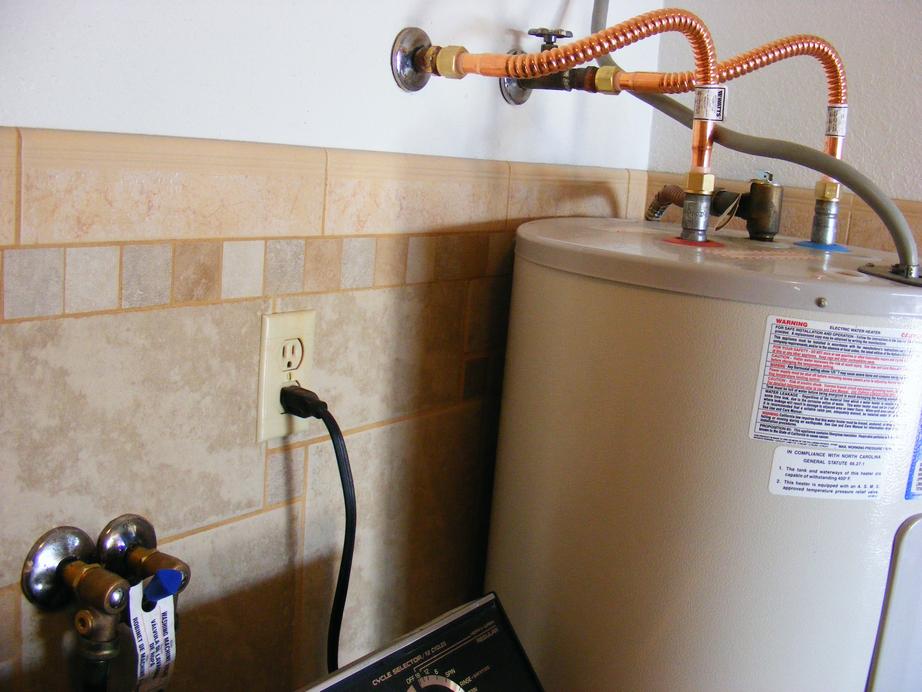
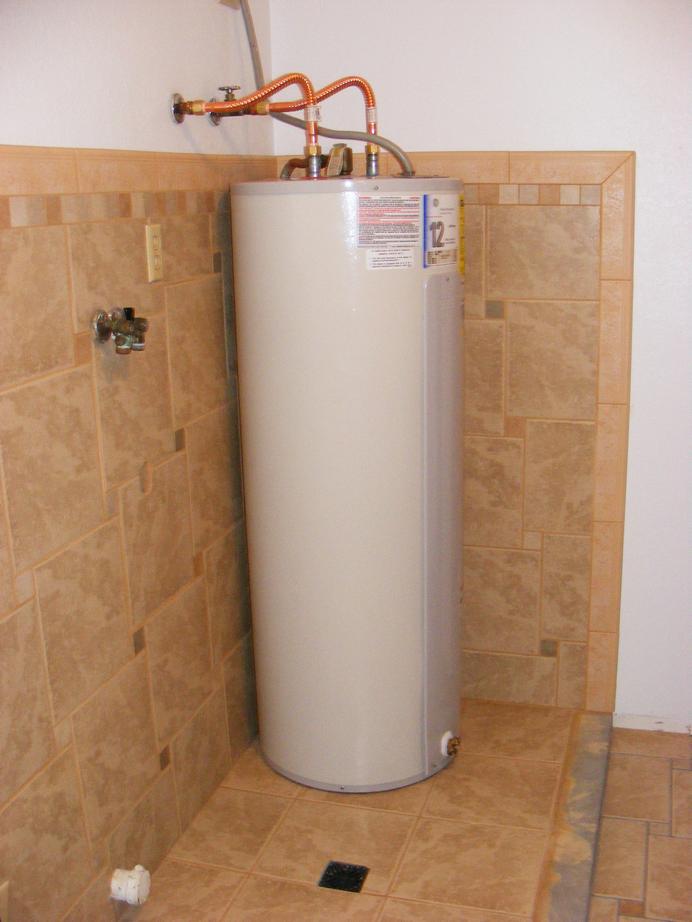
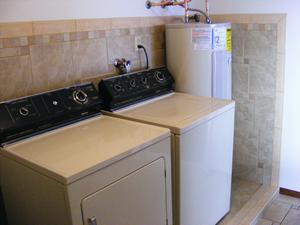
| The electric water heater in place with bright new plumbing that doesn't leak. |
|
|
|
|
|
| Pecos SoftWareWorks Home | Contact Me | Terms of Use Rev 09/30/10 | Privacy Policy Rev 05/20/09 | About Us | Site Map |
| Tweet |
|
||
|
© Copyright 2007-2015 Alan Norton None of the content may be used or reproduced without written authorization from Alan Norton. |
|||