Custom Search
|

|
|---|
|
|
|---|
|
|
|---|
|
Custom Search
|
|
|---|
Recommended for developers:

![]()
Lesser Goldfinch family preening
![]()
LCD Vs. CRT - Do LCDs finally match CRTs in picture quality?
ECS P965T-A Motherboard
ABIT AN8 SLI Motherboard
Foxconn 975X7AB-8EKRS2H Motherboard
Foxconn BlackOps Motherboard
![]()
My misadventures flying with Allegiant Air
![]()
The Missing Post Mystery
A post I made to a Vista newsgroup was missing from the Outlook newsreader
Where did it go?
The Missing Post Mystery Revisited
It happened again! A post I made to a Vista newsgroup was missing from the Vista Mail newsreader
Where did it go?
A Case of Maxtaken Identity
When is a hard drive not a hard drive? Find out when!
![]()
Changes to the Windows 7 Taskbar You Should Know About
Vista Image Capture 'Slipstream' SP1 and SP2 into a single Vista install disc
Detailed Instructions for Reverse Integrating SP1 and SP2 into Vista
What is RAID? Some RAID Basics
RAID 5 on a Desktop PC
How to Personalize Windows Vista
Develop and Implement a Personal Backup Plan
Ten things you can do to create better documentation
(Tech Republic)
Flash Your BIOS
Three Good Reasons for Flashing Your BIOS
Ten common mistakes you should avoid when flashing your BIOS
(Tech Republic)
Find a new dial-up ISP
Sign up for 10 free hours of NetZero access!
Create a Shutdown/Sleep/Restart or Continue Icon For the Vista Desktop
What is a computer guy doing with home remodeling projects on his Website?
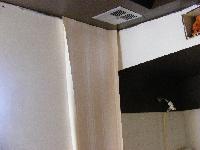
The Upscale Utility Room Remodel with Catch Basin and Wraparound Ceramic Tile Wall
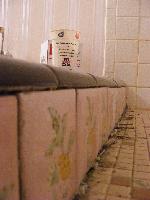
The Bathroom Remodel for Under $1000 Project
The Do It Yourself Bedroom Engineered Prefinished Red Oak Wood Flooring Installation From Hell
Bedroom Remodel With Wood Parquet Flooring
Use Comodo Internet Security 4.0 to Lock Down Your PC Following a Windows Install or Reinstall
![]()
The Northstar Horizon Microcomputer
![]()
Round-Tailed Ground Squirrels

Prairie Dogs

American Kestrel Falcons "Sparrow Hawk"

Arizona Sonoran Desert

Arizona Sunsets

Cienega Creek

Trains In the Desert

Desert and Mountain Flowers

Fox Squirrels

![]()
The Other Reason Why Your Irrigation Valve Might be Leaking
My Response to the Newegg Affiliates Program Changes
Playing the Rebate Game
Know the Rules Before You Play
Vista Confusion
The four questions you need to ask before buying Vista
Click on thumbnail to see a larger image


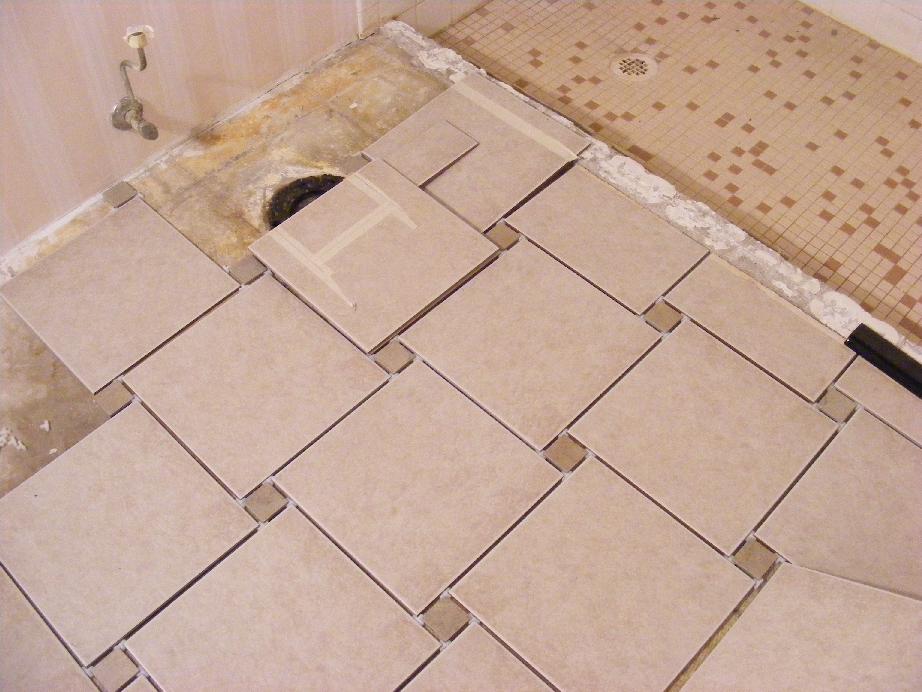


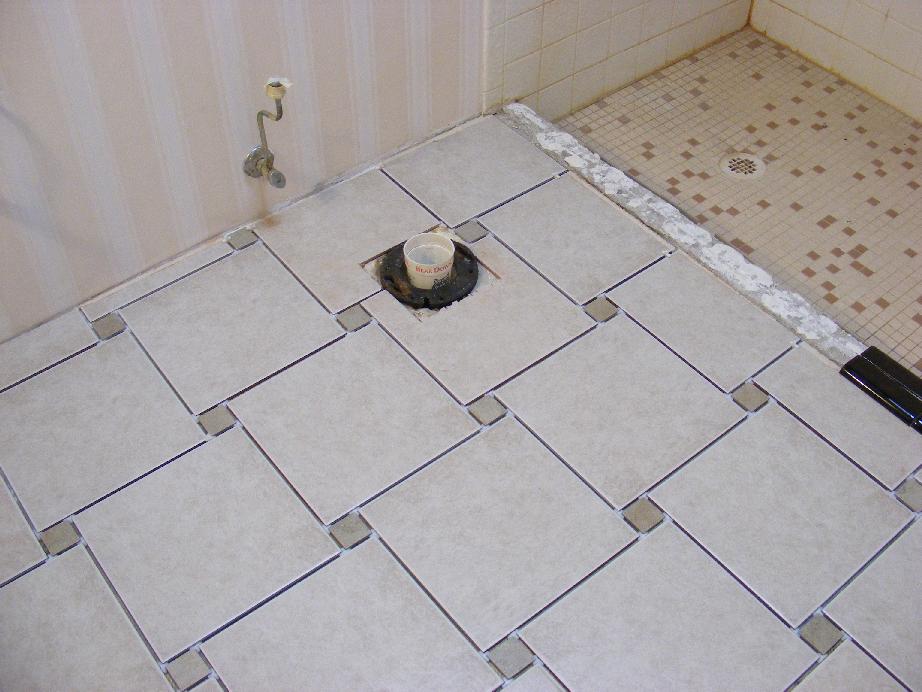
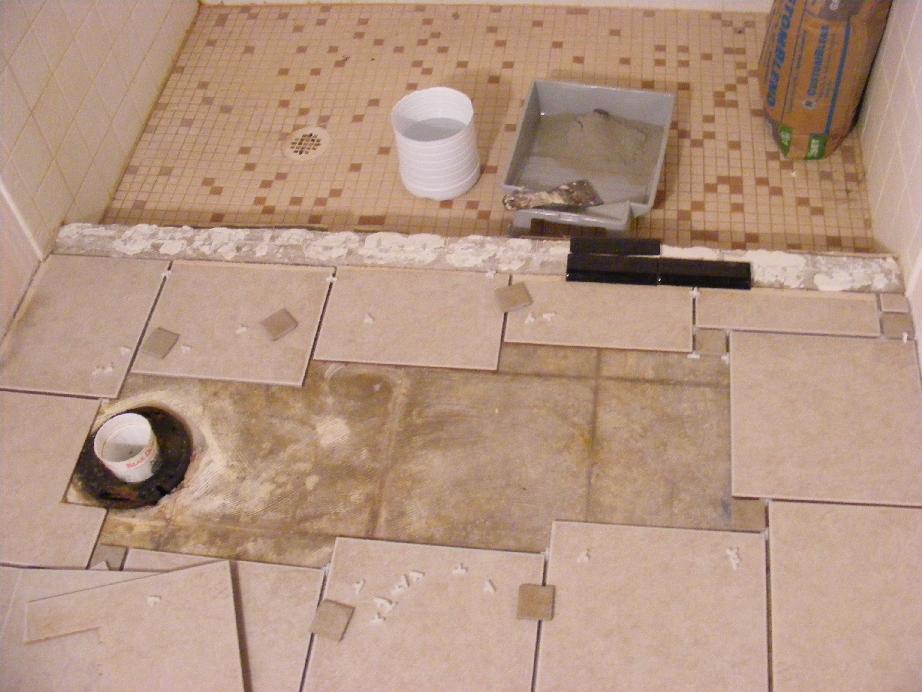

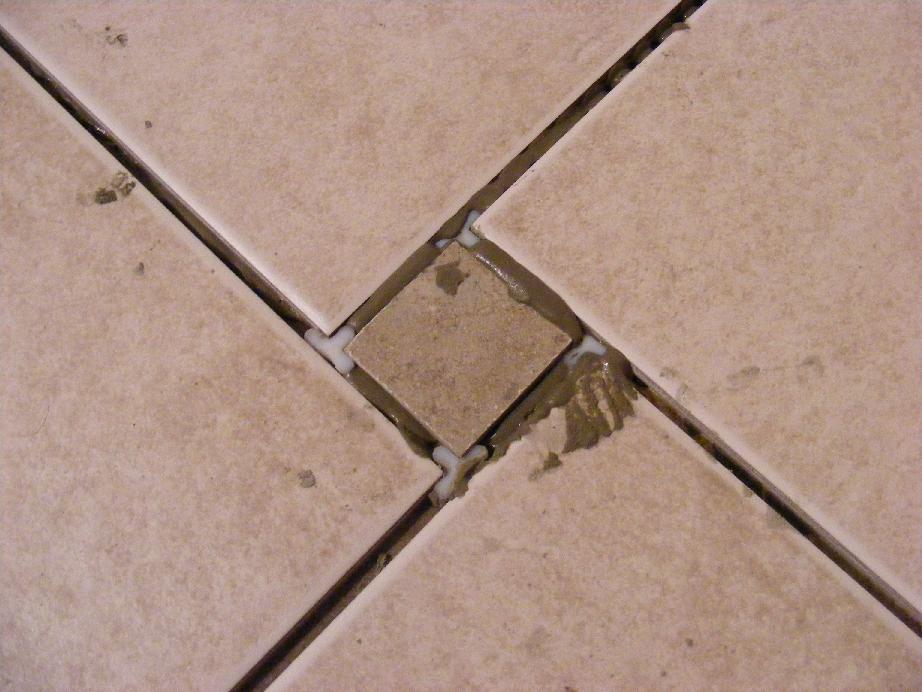


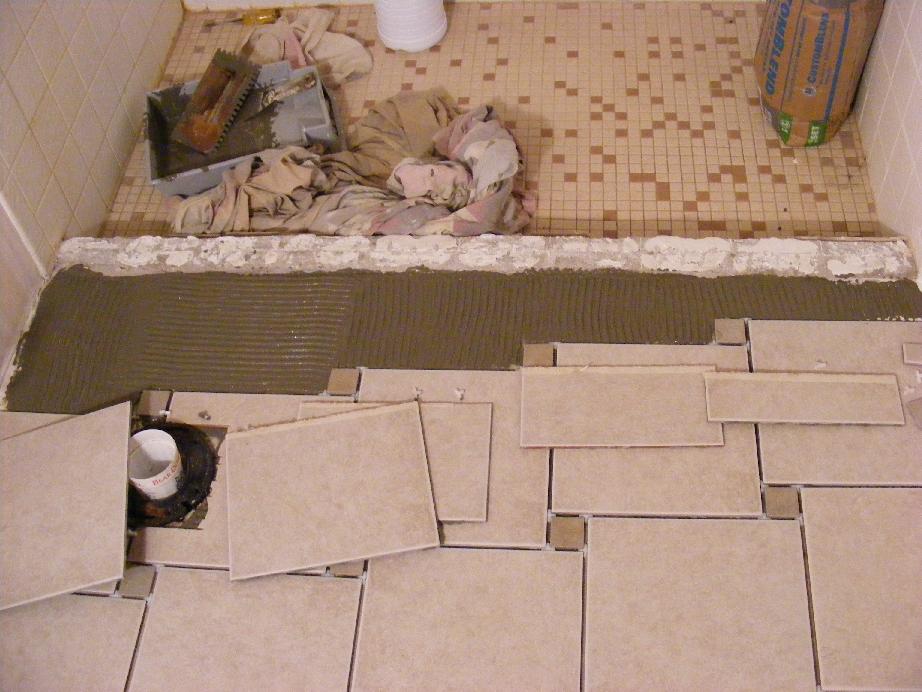
I had purchased the 3/16 inch '+' spacers to use to set the tiles. I quickly realized that the 'plus' spacers wouldn't work with the type of layout I planned. I needed the 'T' spacers. Rather than making another trip to Home Depot, I got out a box cutter and cut off one leg of the 'plus' spacer. The soft flexible spacers cut easily. Voila! I now had 'T' spacers.
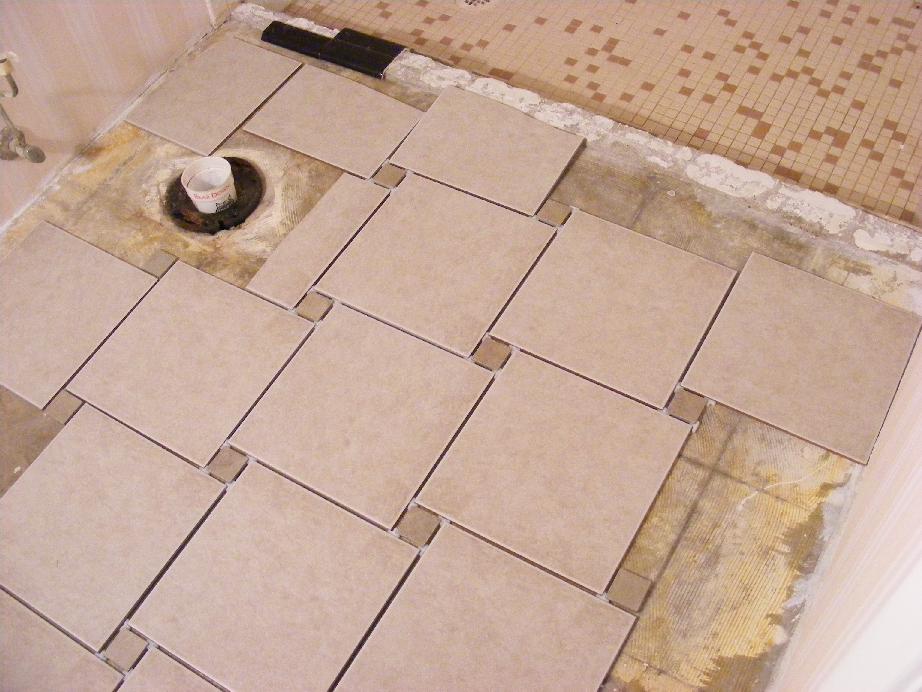
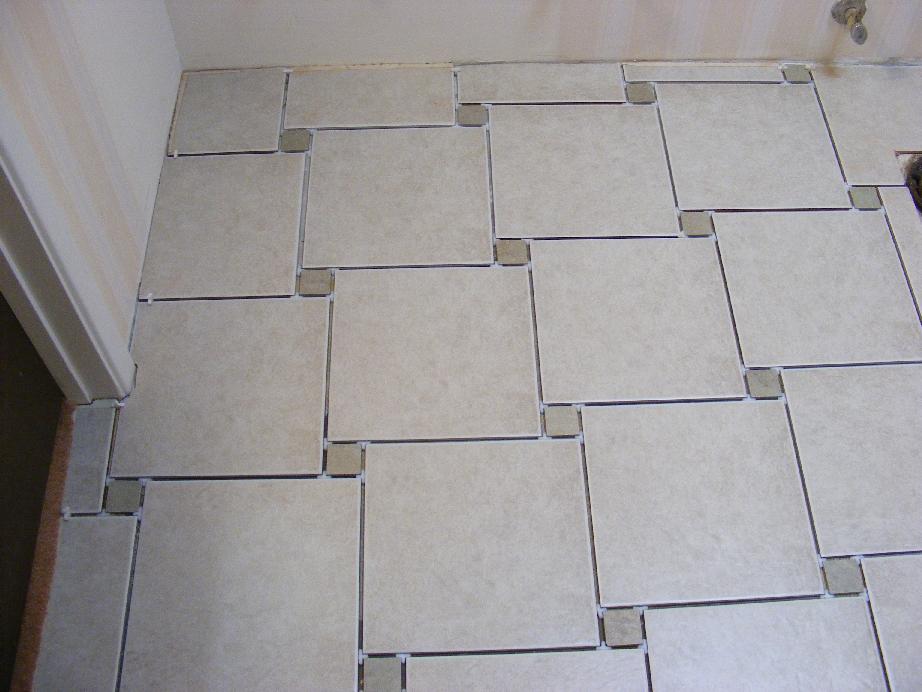
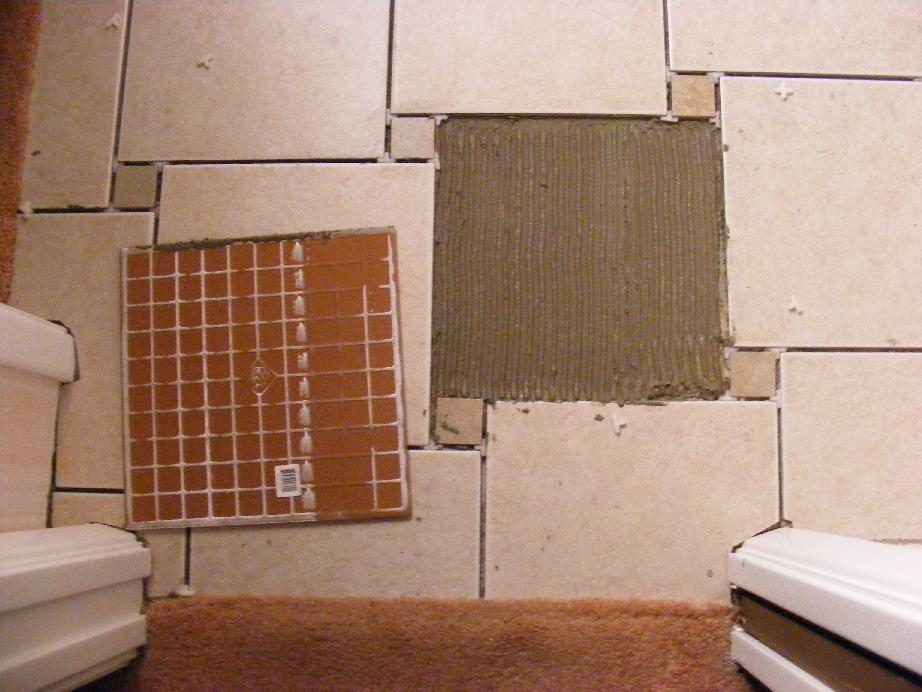
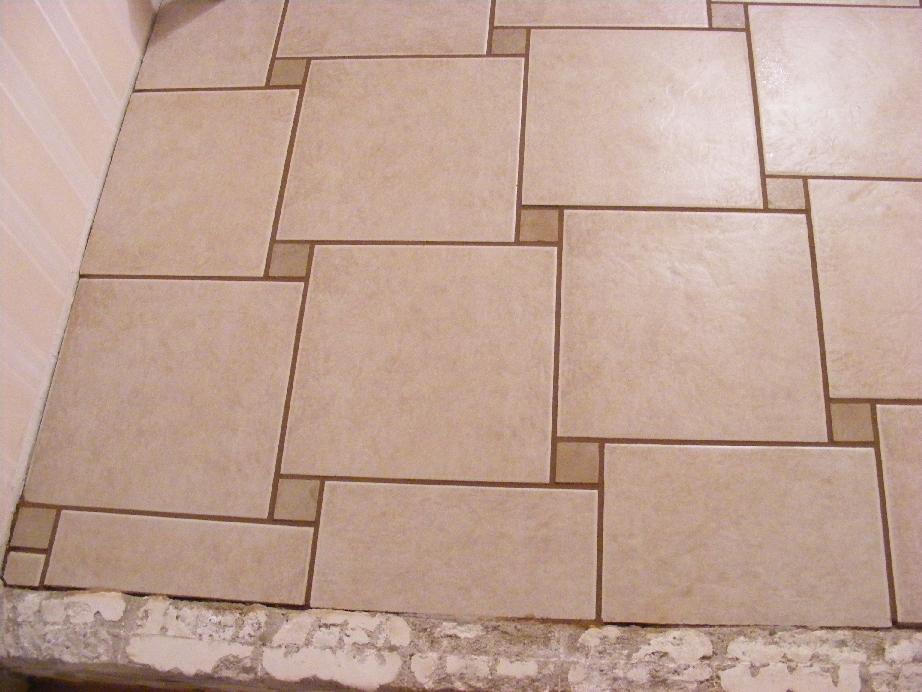
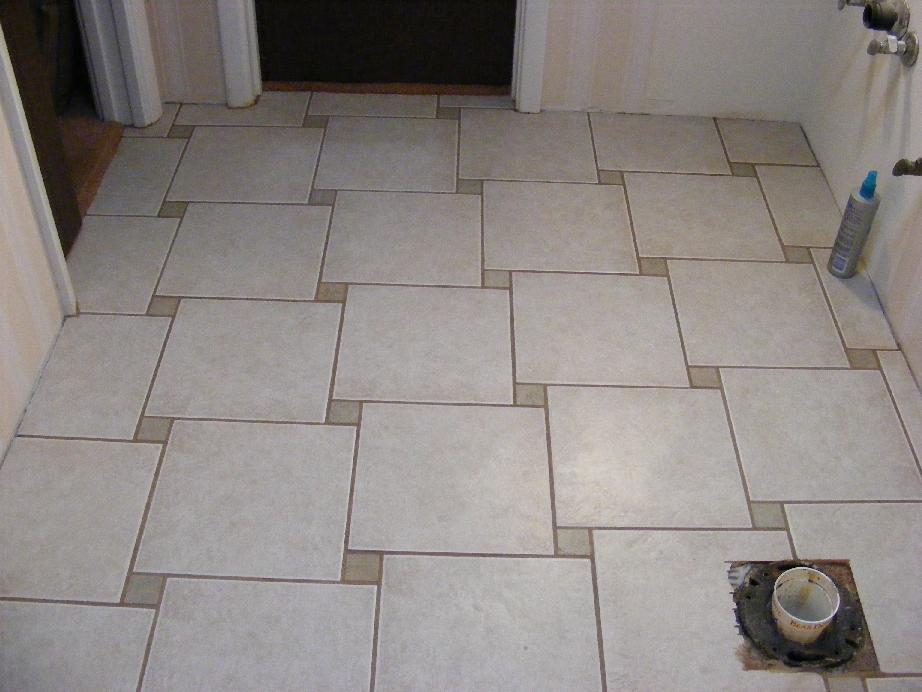
After a few trials I found a layout that worked well. In particular, the front tile that fit under the front of the toilet was centered to the middle of the toilet for a cleaner look. For a larger room I wouldn't have laid out all of the tiles but only enough to determine that the pattern was square to the walls and enough to be able to cut all of the edge tiles before starting the tile-setting process. For an example of this layout in a larger room, take a look at how I laid out the wood parquet tiles for my bedroom remodel.
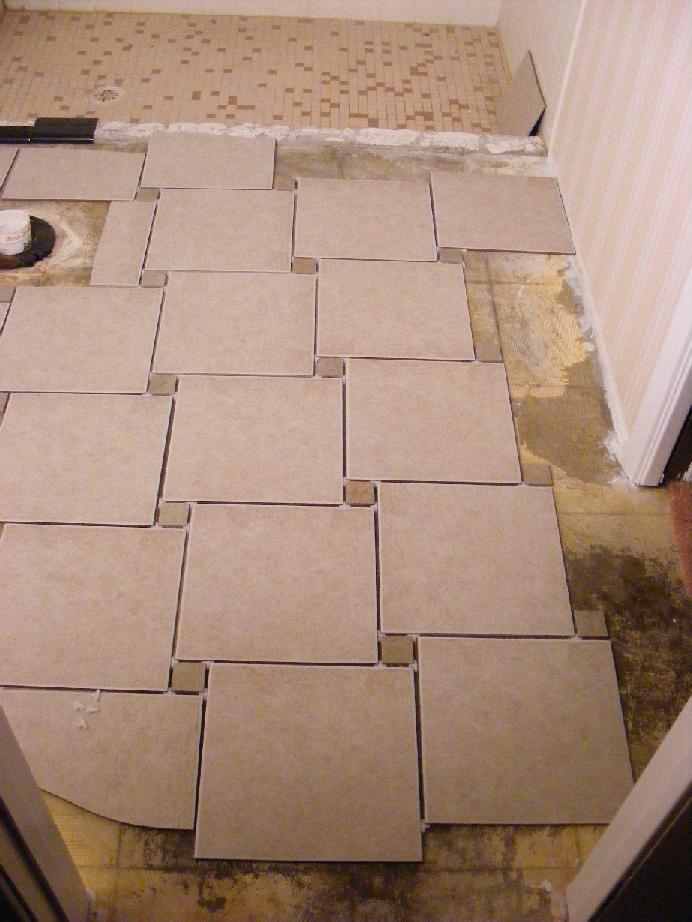
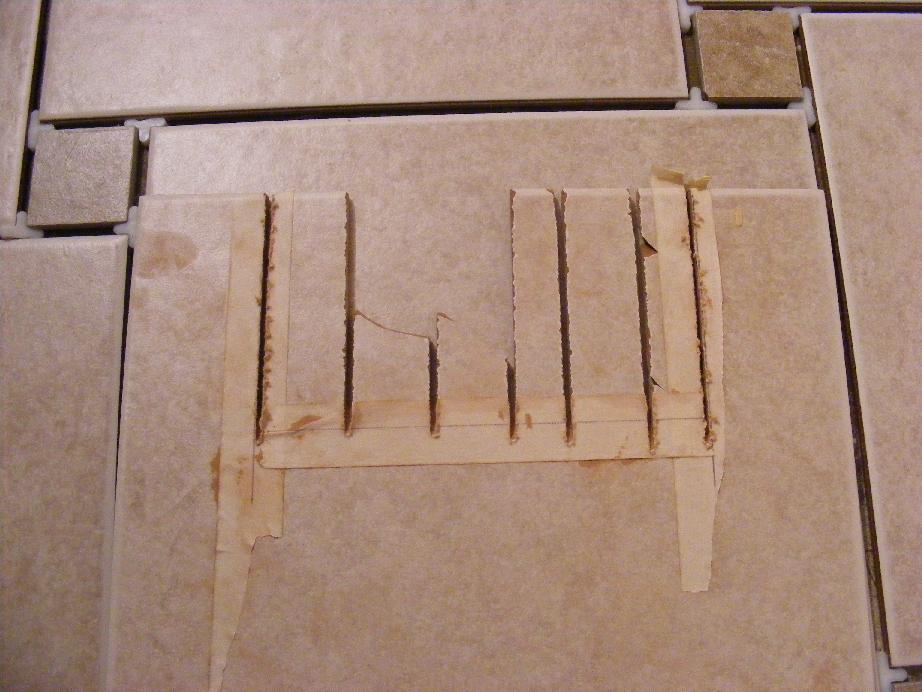
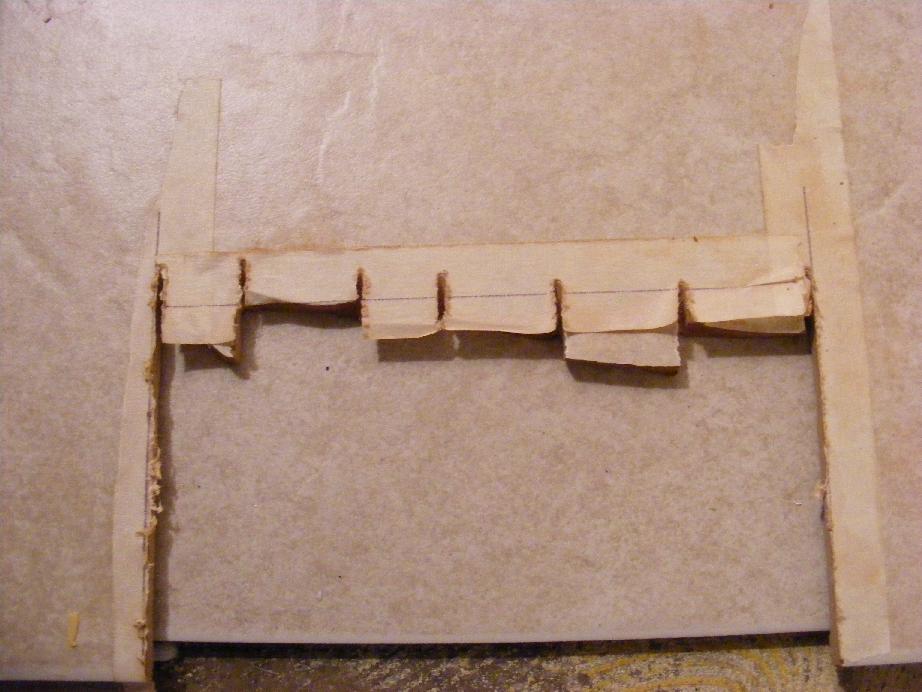
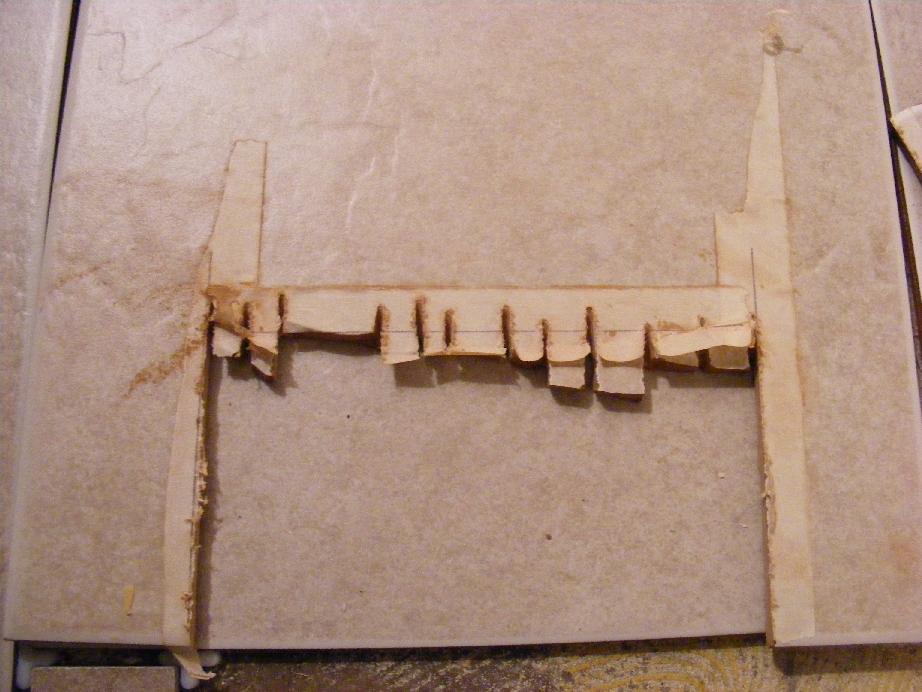
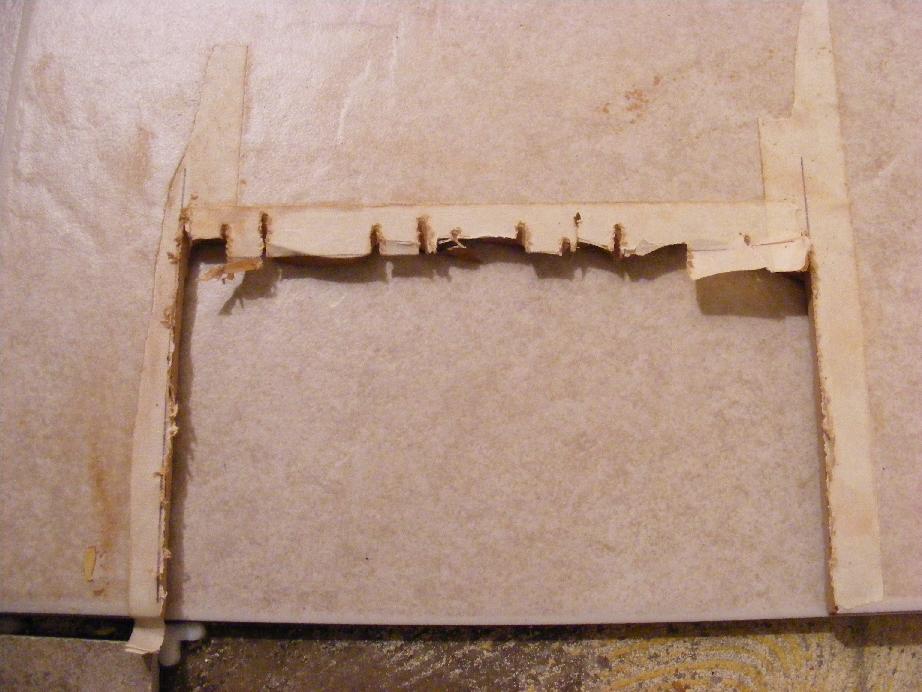
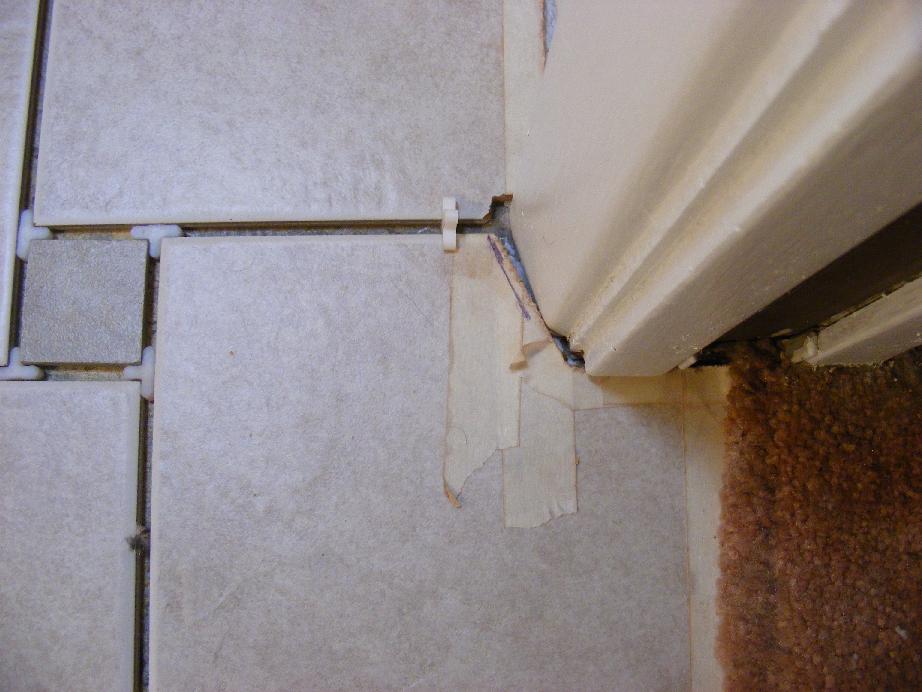
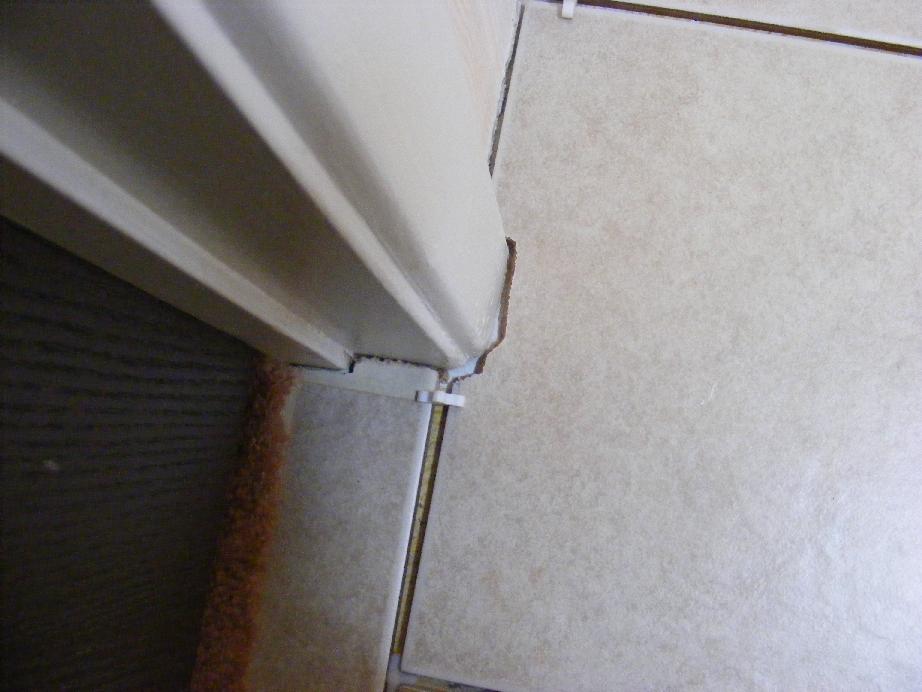
I cut the tiles with my radial arm saw and dry ceramic tile diamond blade. The area around the door trim was challenging. I could have undercut the door trim and set the tile under it. I decided to spend the time to carefully cut the tiles to match the trim. Some of the tiles were fairly complex. I am pleased with the results.
There are some precautions that you need to follow before using a radial arm saw and a dry-cut blade to cut ceramic tiles. Please read these precautions before using this type of setup to cut ceramic tile.
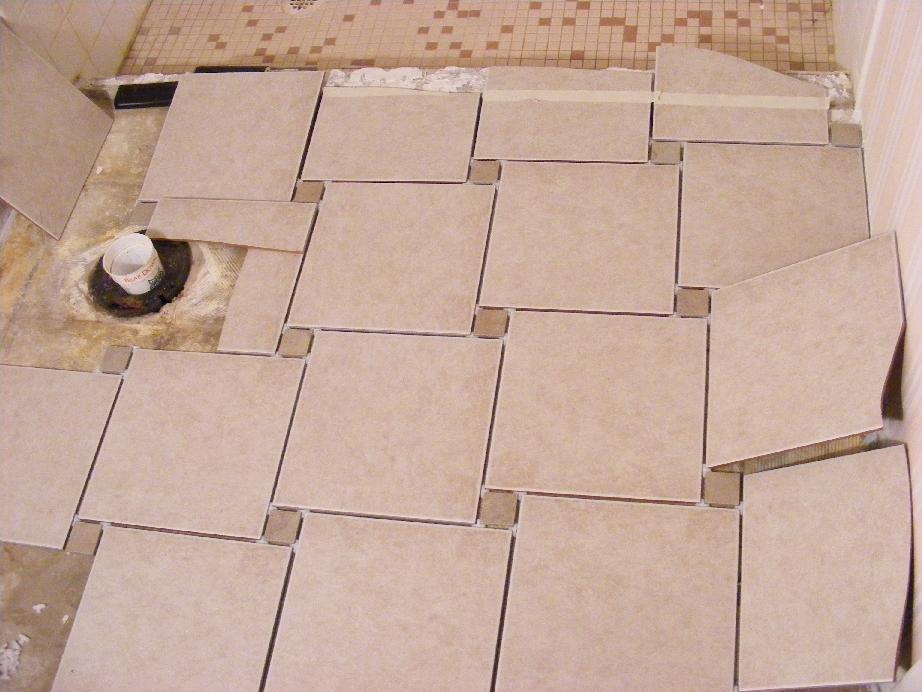
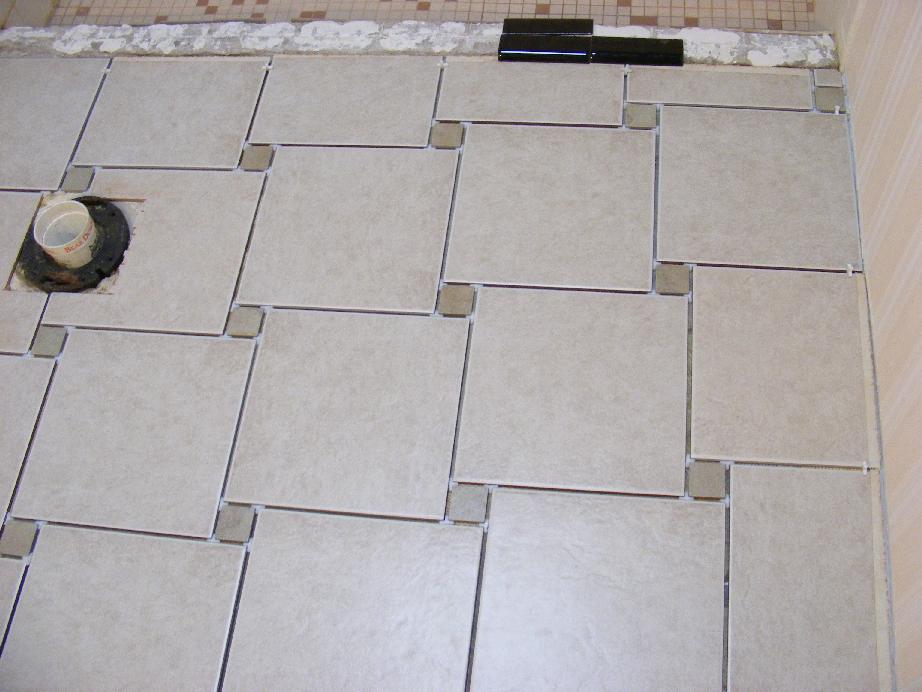
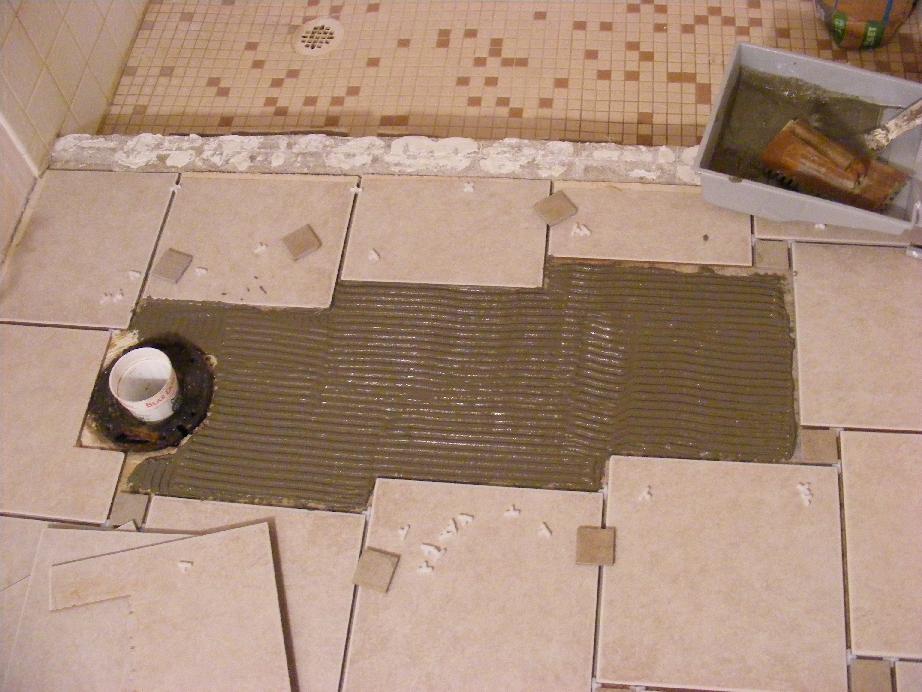
I finished setting the cut tiles and mixed up a batch of tile-set. I removed one row of tiles and put the tile-set down on the floor with the proper 1/4 x 3/8 x 1/4 square notched trowel for 8-12 inch tile . I was using two and twelve inch tiles for my project. Working with tile-set is easy compared to wood and vinyl tile adhesives. The working time is plenty long enough for you to take your time to get the tile-set properly in place. The tile-set should be thick enough so that the ridges that you will create do not fall back down into the grooves and thin enough to be able to spread easily. With a little experience you can tell when you have the right consistency that is similar to pudding.
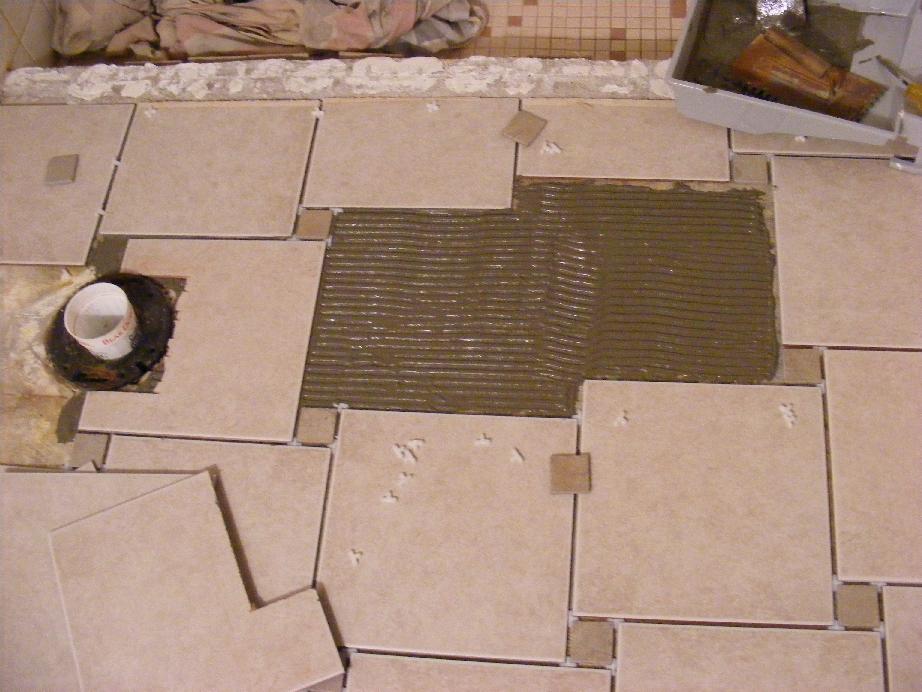
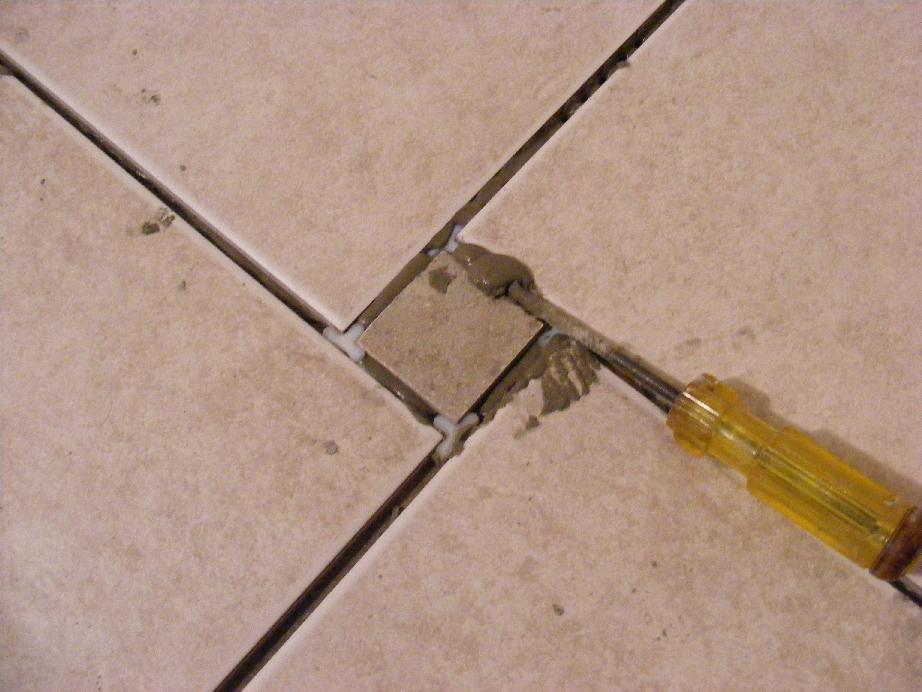
After the tile-set is down, you add the tiles by placing one edge in place perpendicular to the troughs of the tile-set. You then slowly lower the tile into place and set the spacers back into place. Setting the tiles this way will reduce the likelihood of air pockets under the tiles. Firmly press down the tiles and pass your hand over the tiles to feel any tiles that are higher than their neighbors. Don't worry about the tile-set that oozes into the 3/16 inch gap between your tiles. This is easily removed with a narrow regular blade screw driver after each row is set in place. If you don't have tile-set oozing up between your tiles you haven't set the firmly enough in place or you don't have enough tile-set under the tiles.
Tip: Use a straight, non-bowed piece of wood that spans two full tiles to set the new tile. Push down on the board or lightly tap it with a hammer to set the new tile at the same height as the surrounding tiles.
After setting all of the tiles and removing the excess tile-set, I let the tile-set dry for 24 hours. The instructions on the CustomBlend Thin-Set mortar that I used say that you need to allow at least 12-24 hours for the tile-set to dry. The instructions on the PolyBlend grout require at least another 72 hours for the grout to dry before sealing. Read the instructions on the tile-set mortar and grout container to determine the proper drying time. Always seal your grout joints!
I then carefully removed the spacers by slipping my handy dandy thin bladed regular screw driver under the spacers and wiggling and pushing the blade under the spacers. After one of the edges of the spacer was raised high enough I could easily remove the spacer. I again used the screw driver to dislodge the dried tile-set that had oozed up next to the spacers and then removed as much of it as possible.
The two inch tiles I was using had a flat backed smooth surface. This meant that they wouldn't adhere to the floor as well as other tiles. I had to be careful not to dislodge them. This isn't a problem. Once the grout is in place the two inch tiles will be firmly set in place.
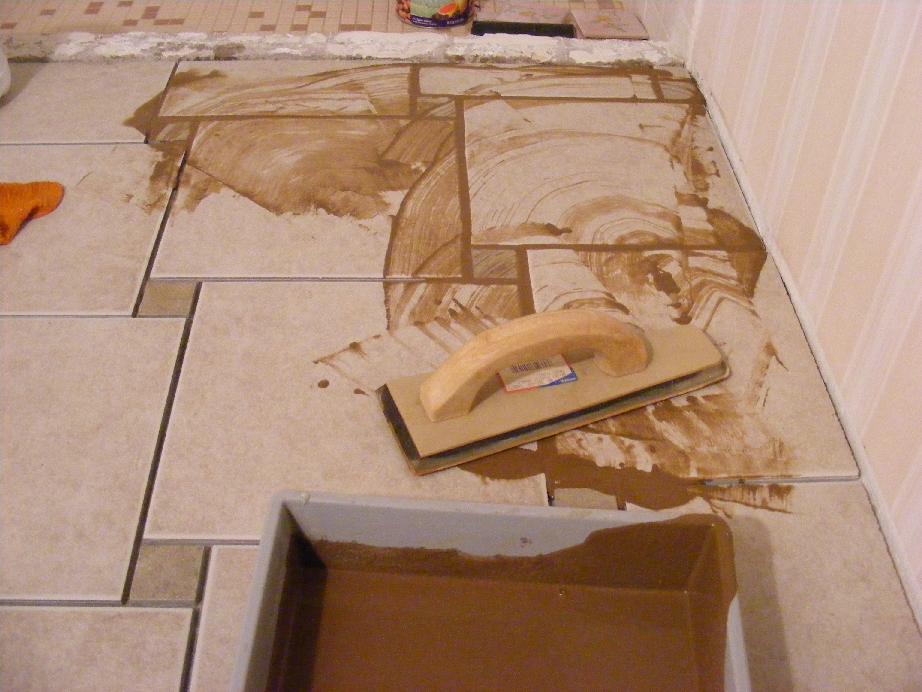
It was time to grout the tiles. Grout is mixed to a thinner consistency than the tile-set. Adding too much water can weaken the grout so be careful to get the right consistency. I used a ceramic tile float and held the float at a 45 degree angle to the tile face and forced the grout into the grooves. By moving the float at a 45 degree angle to the corners of the tiles you can avoid having the float drop into the space between the tiles. This will give the perfect grout height. Let the grout set for 15-20 minutes and using a lightly dampened rag remove any excess grout on the tiles. If you find that your rag is removing grout and leaving an uneven surface, add a little more water to your rag.
My tiles like many others have a slight angle at the edges. You want your grout height to match the bottom of these angled edges. When done properly, you should be able to see a clean straight line where the grout meets the tiles. This is easier than it sounds. It is fairly easy to remove the excess grout and get a nice clean grout line.
After grouting, you should place a piece of plastic over the floor to prevent the grout from drying too quickly and possibly cracking. You can also use a spray bottle to spray clean water onto the grout several times over the next 72 hours. A final cleaning with a damp rag to remove any film left on the tile finishes the project. Don't use too much water on the rag. This can draw the grout coloring from the grout. When dry don't make the mistake of not sealing the grout. Find a good grout sealer that will dry clear without changing the grout color. I was disappointed with the AquaMix grout sealer that I got a Lowes. It claims that it won't change the color but it made the grout slightly darker and if not carefully wiped from the grout, the milky liquid will dry leaving the grout with milky colored patches.
| Item | Manufacturer | Cost | Source |
|---|---|---|---|
| 12" Ceramic Tile | Unknown | $20.40 (30 x $.68) | Home Depot |
| 2" Ceramic Tile - 4x12 Mosaic | Morro Bay | $.38 | Lowes |
| 3/16" Spacer | Superior Bilt | $2.47 | Home Depot |
| Tile-Set | CustomBlend | $4.87 | Home Depot |
| Colored Sanded Grout | Custom Polyblend | On Hand | N/A |
| Grout Sealer | Aqua Mix | $7.97 | Lowes |
| Tile Trowel | Unknown | On Hand | N/A |
| Grout Float | Superior | On Hand | N/A |
| Diamond dry-cut Blade | Dewalt | On Hand | N/A |
| Radial Arm Saw | Craftsman | On Hand | N/A |
| Ceramic Tile Total | Ceramica Cotto | $36.09 | N/A |
|
|
|
|
|
| Pecos SoftWareWorks Home | Contact Me | Terms of Use Rev 09/30/10 | Privacy Policy Rev 05/20/09 | About Us | Site Map |
| Tweet |
|
||
|
© Copyright 2007-2015 Alan Norton None of the content may be used or reproduced without written authorization from Alan Norton. |
|||